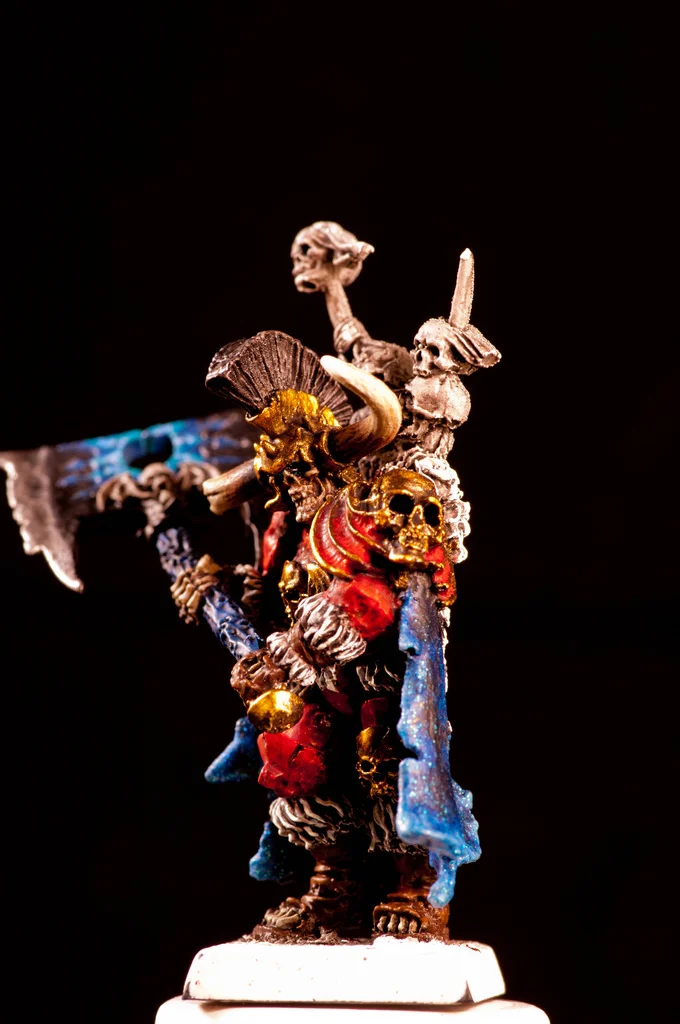
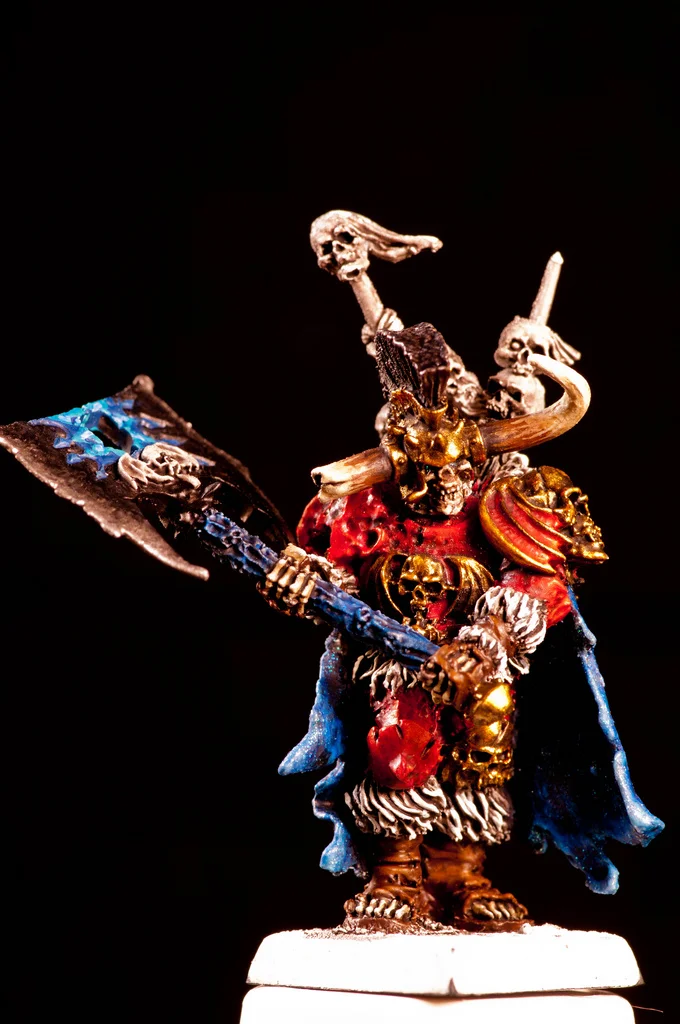
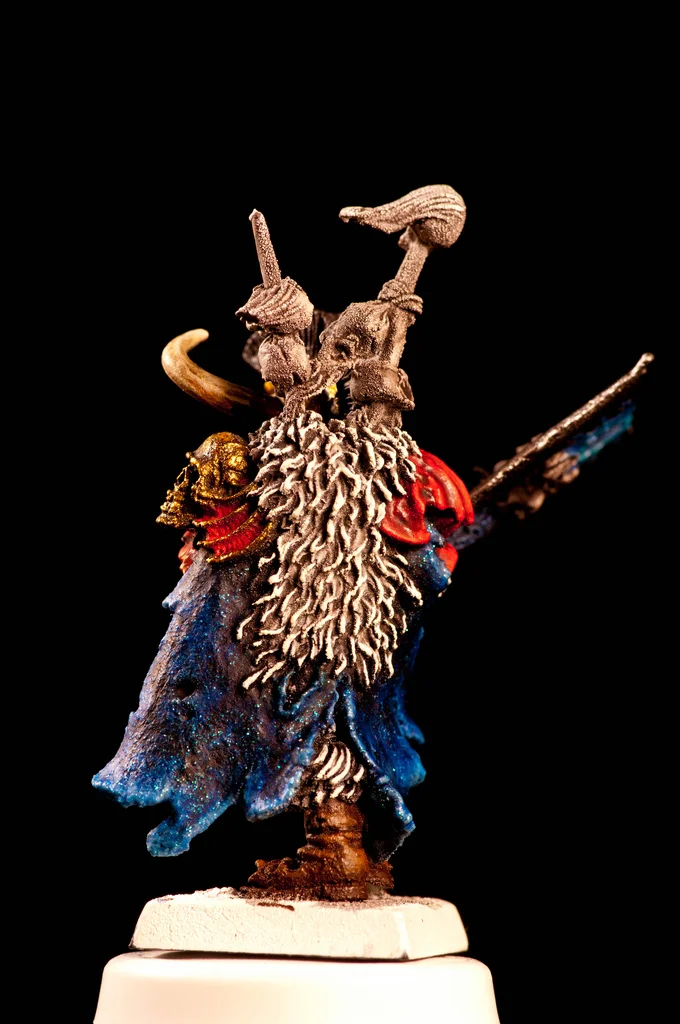
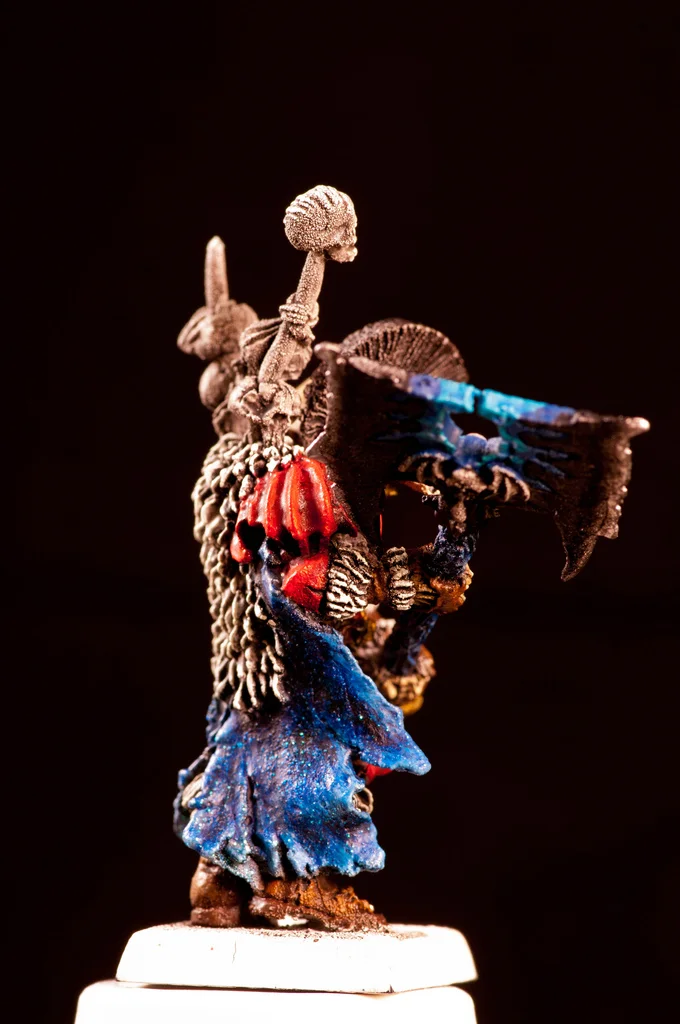
The Lost Legion of Starlight

  • The masquerade of murder returns! A new game of Vampires Amongst Us has begun. Unmask the killers, trust no one, and try to survive the night. Find out more and sign up now!

zreef

Zombie
Jun 12, 2012
36
Zombies
40
hey everyone! I just joined the forum and I just started VC. I have been playing warhammer for years, but this is my first foray into 8th edition.

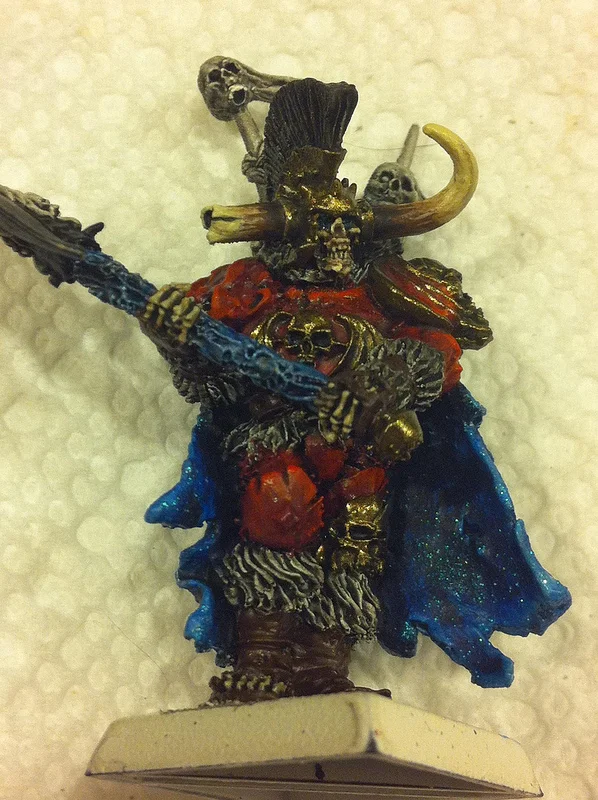
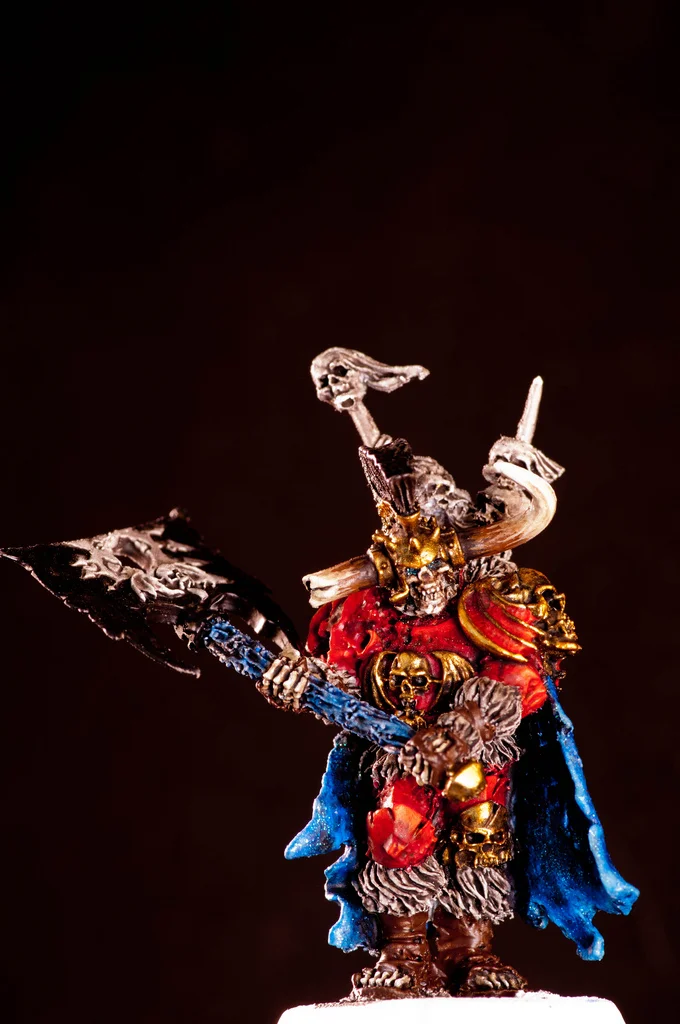
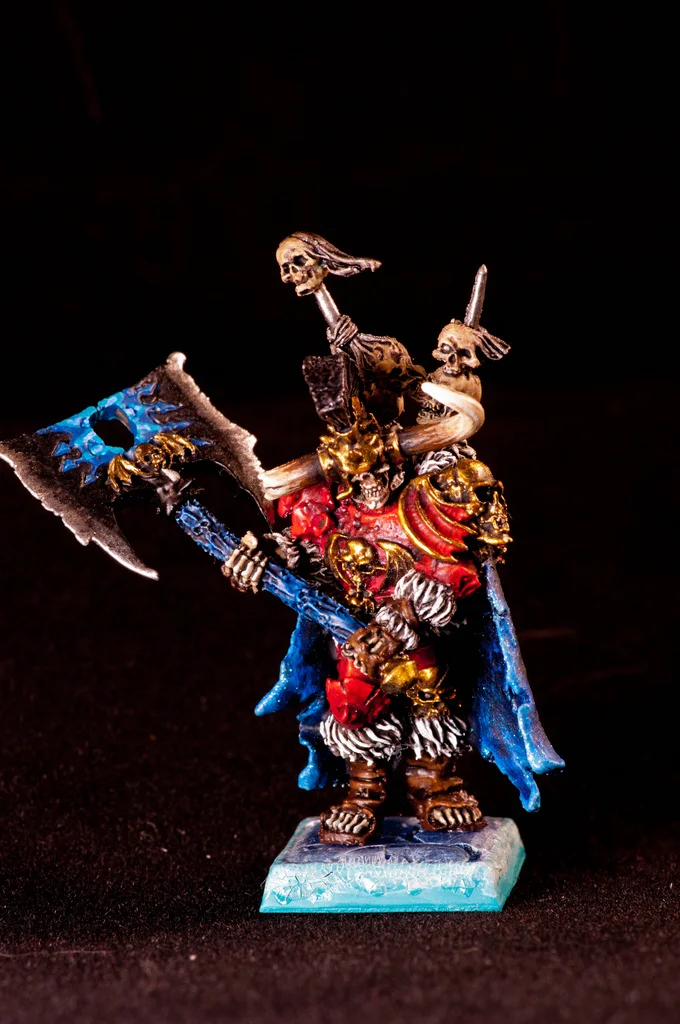
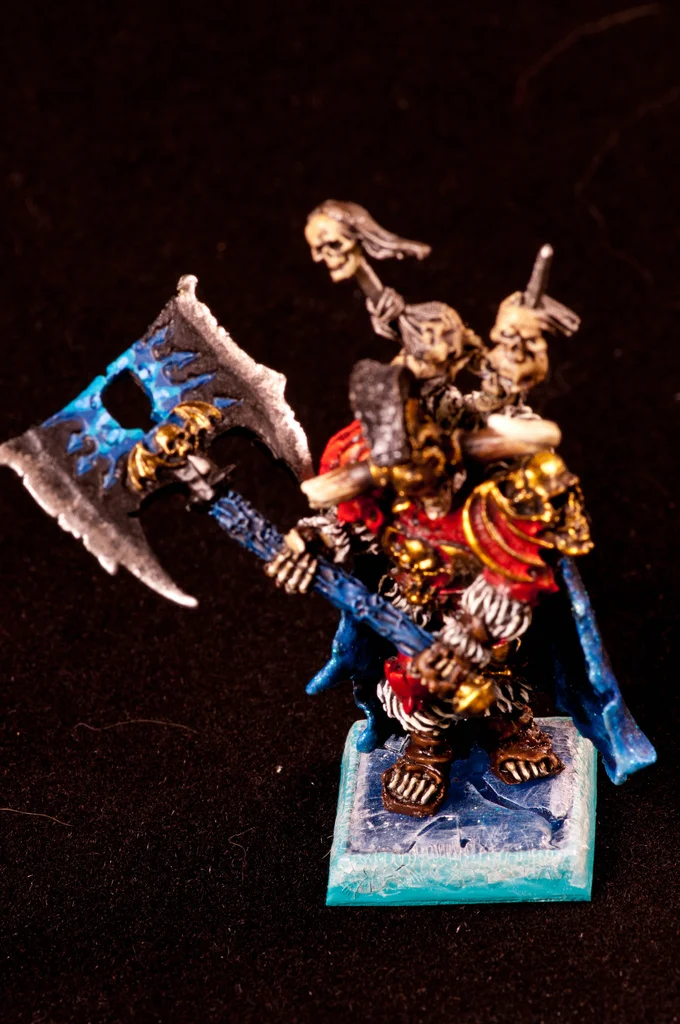
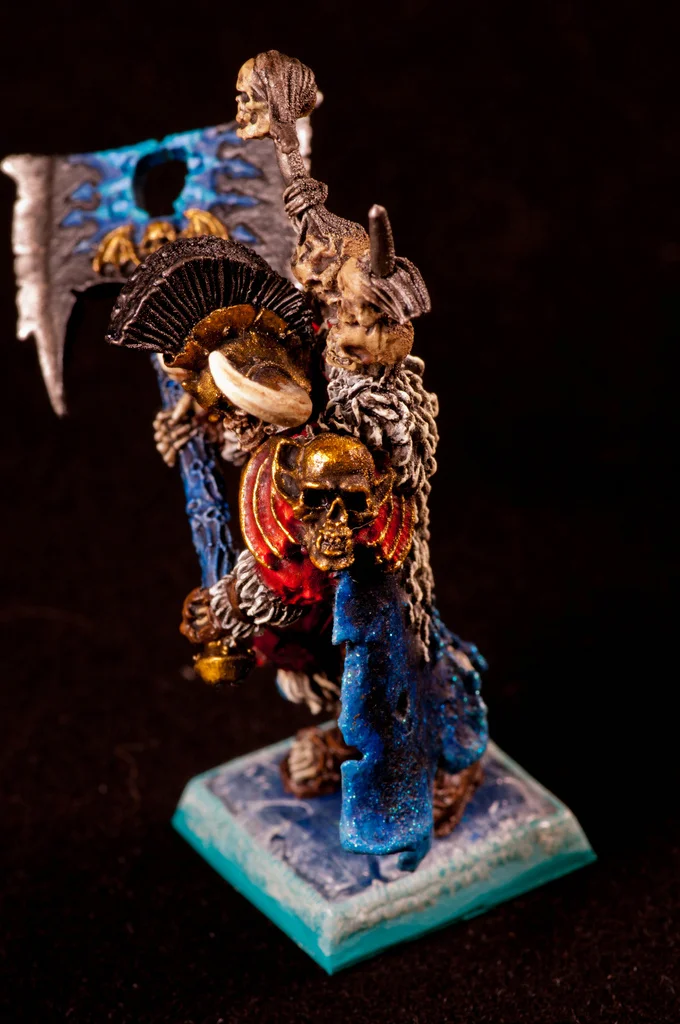
For now a crappy iphone pic will have to suffice, but here is Krell (still a relatively early WIP shot)... or has he will be known in my army ... GG champion (still thinking of a name). I came up with some fictitious magic items for my GG champion (no actual in game effect, just fun to think up a back story). He wears blood armor of Andor, the cloak of eternal starlight, and wields the black axe.

afarm6.staticflickr.com_5272_7364225994_68fe09b893_c.webp
 
RE: new and a WIP shot

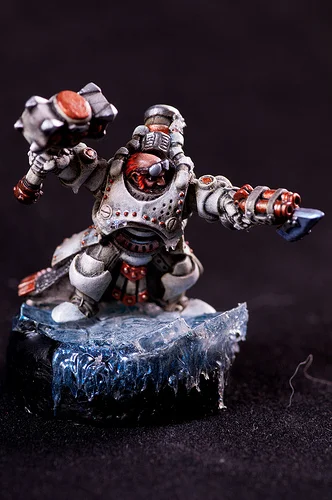
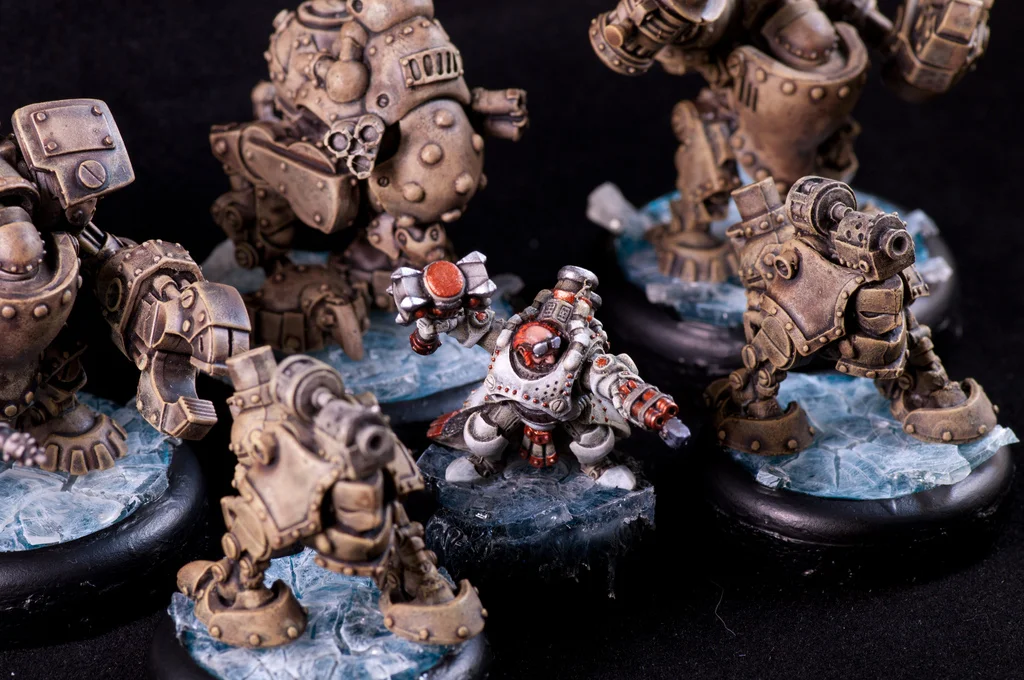
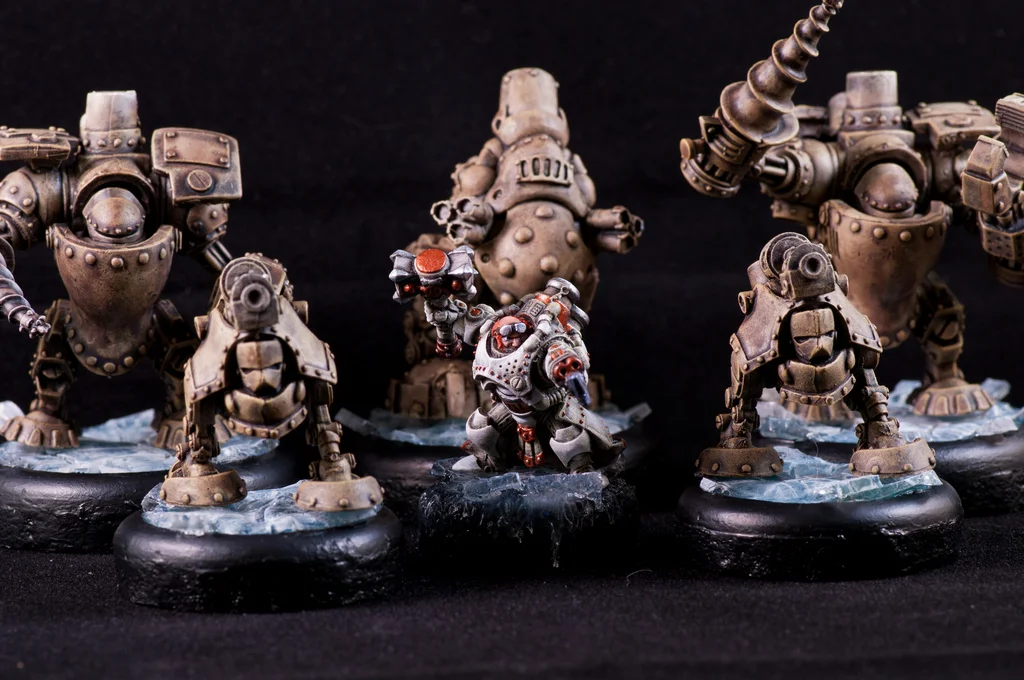
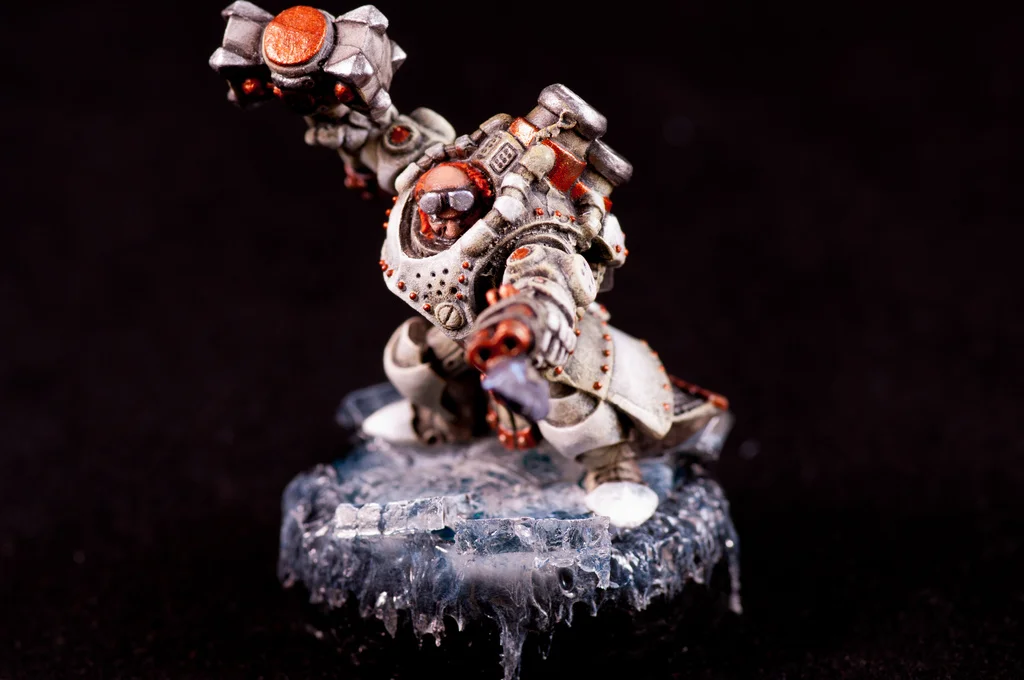
Thanks for the compliment! I am thinking about doing glacial ice for the bases, similar style to my warmachine seaforge ... something along the lines of my Gorten

afarm8.staticflickr.com_7067_7146796047_e728b8015d.webp

afarm6.staticflickr.com_5195_7146799049_c53a67e5da.webp


For the theme I would do red armor, kind of a more "ancient" looking bone (a bit darker), dark gold accents to the armor, dark brown leathers, dark blue / light blue magic weapons, and glacial ice for bases ... thoughts?
 
RE: new to the forums and a WIP shot

I'm looking and wrapping my brains....

pieces of glass?

They look fantastic!

[Edit: Oh, and welcome to the forums!]
 
RE: new to the forums and a WIP shot

Thanks! I can pass on how to make the bases!

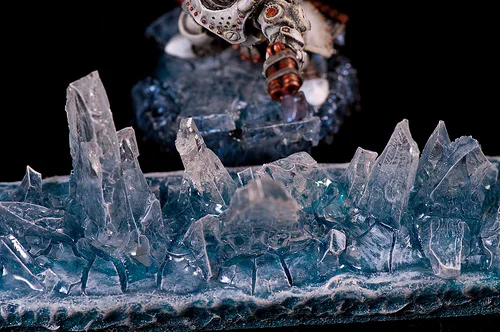
This tutorial will walk you though how to make some fun ice bases like these:
afarm9.staticflickr.com_8027_6987980994_5b14867055_b.webp

afarm8.staticflickr.com_7184_6987983018_6f73da2c7e_b.webp


Part 1 --- Prep Work:

You will need:
a) 1/4 inch foam board
b) plastic PP bases
c) crackle paint: http://www.amazon.com/Ranger-Distres...5065888&sr=8-5
d) plastic cutter and exacto knife or dremel
e) files sand paper

Step 1) Creating Ice shards / sheets/ and pieces.
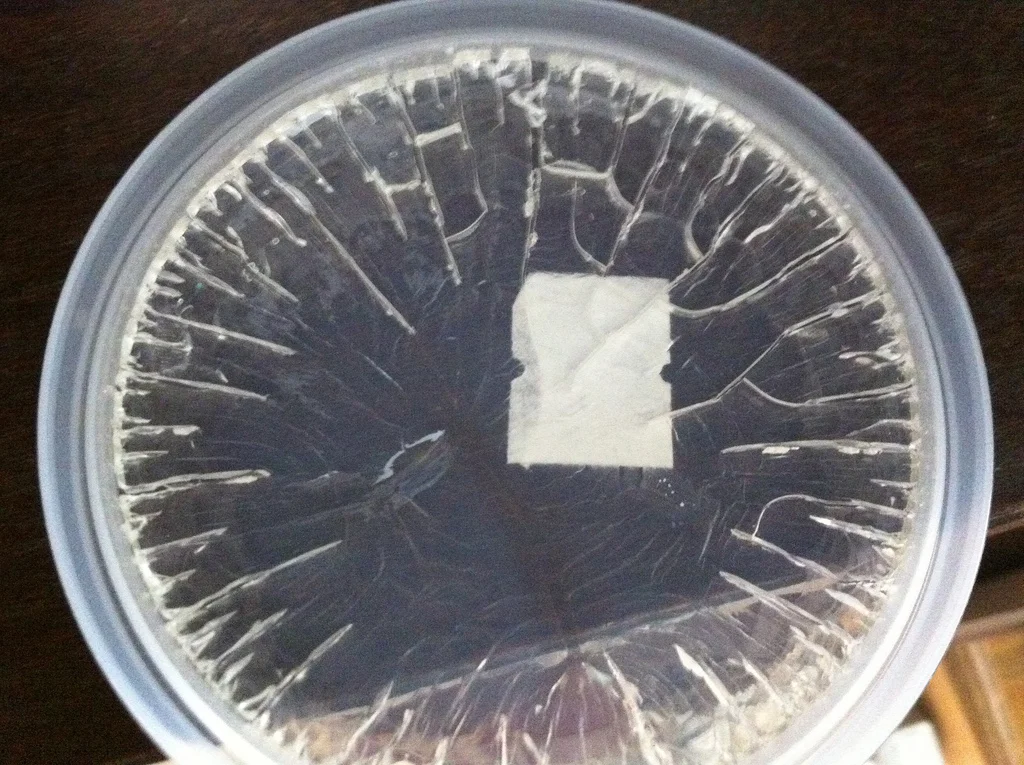
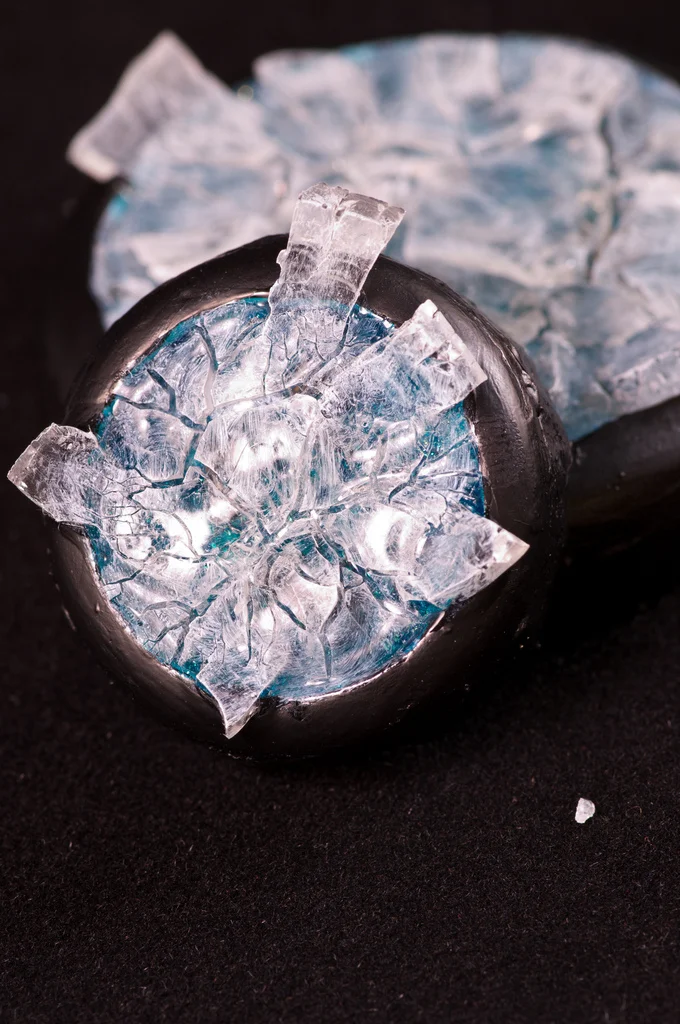
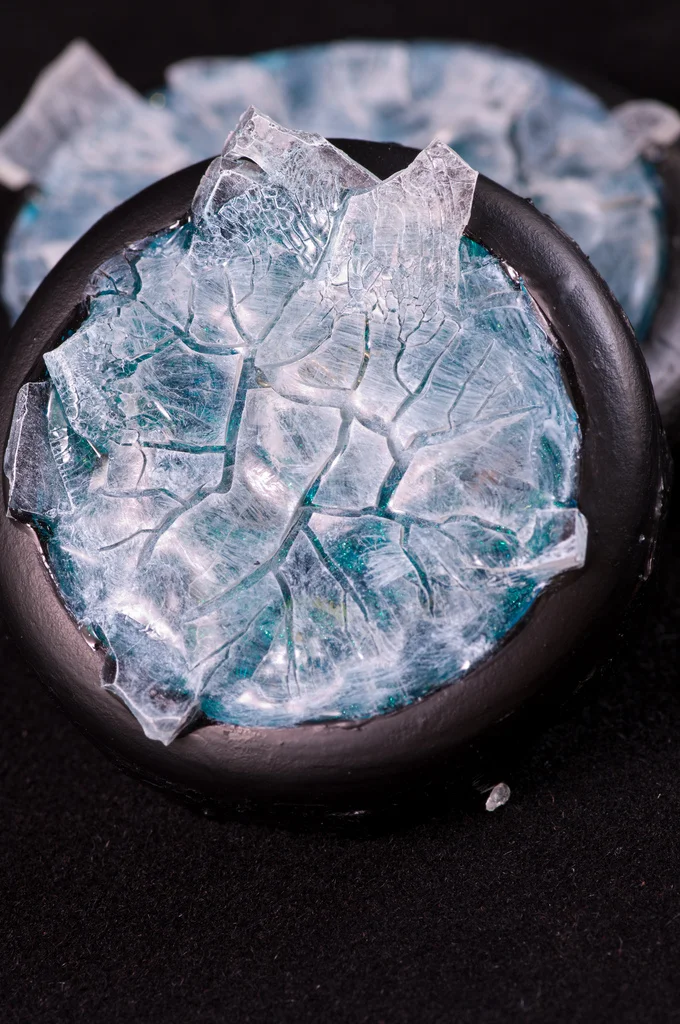
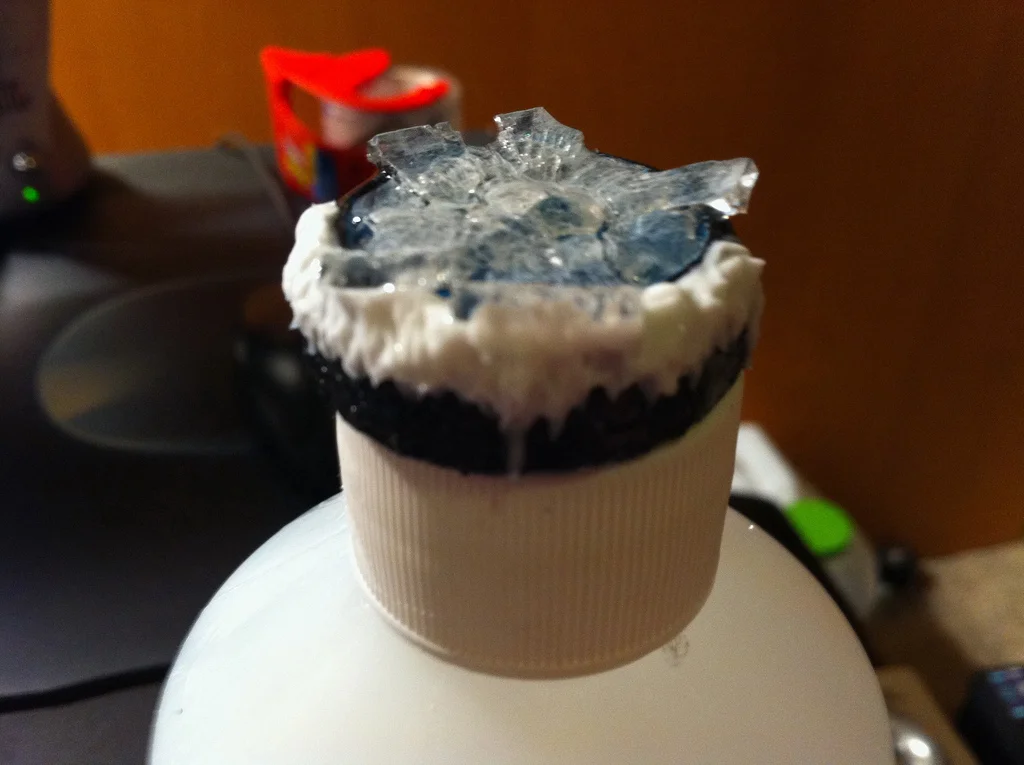
You can create some ice cracks by pouring crackle paint into a flat container ... let this dry for 24 hours and it will break up into various shapes ... for comparison I used the lid to my citadel static grass container ... in retrospect I would like to have done this a bit thicker to get less "flat" ice parts (all the pieces that are sticking out are made in this way). If you make your ice pieces flat you can get some interesting effects by layering the pieces like I did on my base.

afarm8.staticflickr.com_7065_7122552585_37de8f63c9_b.webp


Step 2) take a base and remove the center
****** 2.1) use plastic cutter to remove most of the inner portion of the base
****** 2.2) use an exacto knife to make a more precise cut
****** 2.3) use a file to file down the edge
****** 2.4) use small grit sand paper for a nice smooth edge

Step 3) glue base to 1/4 inch thick foam board

Step 4) cut foam board to fit base (note you could use thin plastic board, I use foam board to get a nice depth in step 5) *** this means the base will have a 1/4 inch pedestal, I plan on having icicles on mine to mark the front arc, if you do not want the base to be raised the 1/4 inch use a thin plastic sheet instead, the foam allows you to make a "deeper" ice as you can cut into it and form it ***

Part II --- Base Background

You will need:
a) the base(s) you prepped in Part 1
b) a light blue or teal paint (I used P3 Arcane blue)
c) exact knife or regular knife
d) blue wash, green wash, and/or purple wash
e) gloss varnish + micro glitter mix (or a fine metallic medium) : I used Fastglitter in the Pearl color http://www.rchobbiesandmore.com/Parm...0-details.aspx
f) stuff to put in your ice

Step 1) paint inside of foam board and base a light to medium blue

Step 2) scrape / cut the inside with a knife, cutting deep "gooves" -- these will be white from the expose foam board, go in lots of random direction to simulate cracks. Be careful to not cut through the foam board!

Step 3) ink either dark blue, dark purple, or dark green ... I actually used a mixture of green and blue ink in a 3:2:3 ration of blue, green, and water, and let dry

Step 4) paint the inside with gloss varnish mixed with micro glitter

Step 5) repeat step 7

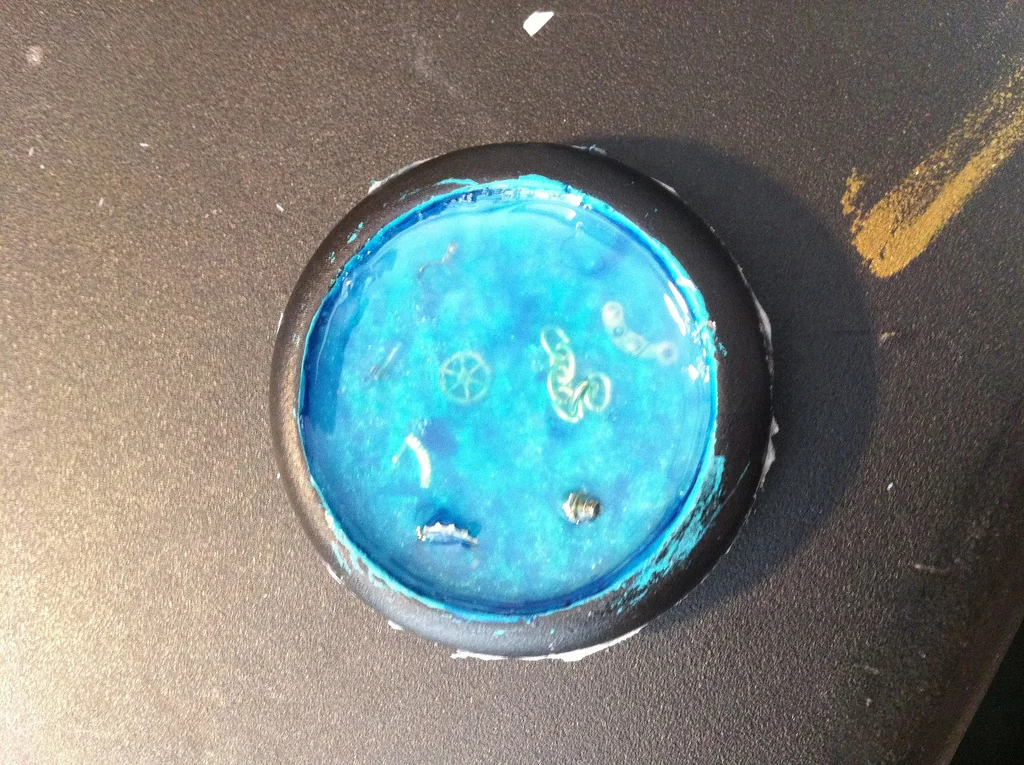
Step 6) add whatever you want in your ice, I used old watch parts ... body parts, jack parts, they all work

Part III --- Building the Ice

You will need:
a) woodland scenics realistic water
b) crackle paint http://www.amazon.com/Ranger-Distres...5065888&sr=8-5
c) Ice shards / pieces / sheets from Part I
d) black paint

Step 1) add woodland scenics realistic water, poor into the base all the way to the top. This stuff will shrink when you

afarm8.staticflickr.com_7177_7123139441_df7dbbe3c3_b.webp


Step 2) let dry 24 hours

Step 3) add woodland scenics realistic water, poor into the base all the way to the top

Step 4) let dry 24 hours (it wont be level with the base top ... and you WANT it to be this way). For large and medium bases you may want to repeat steps 3 and 4 one more time.

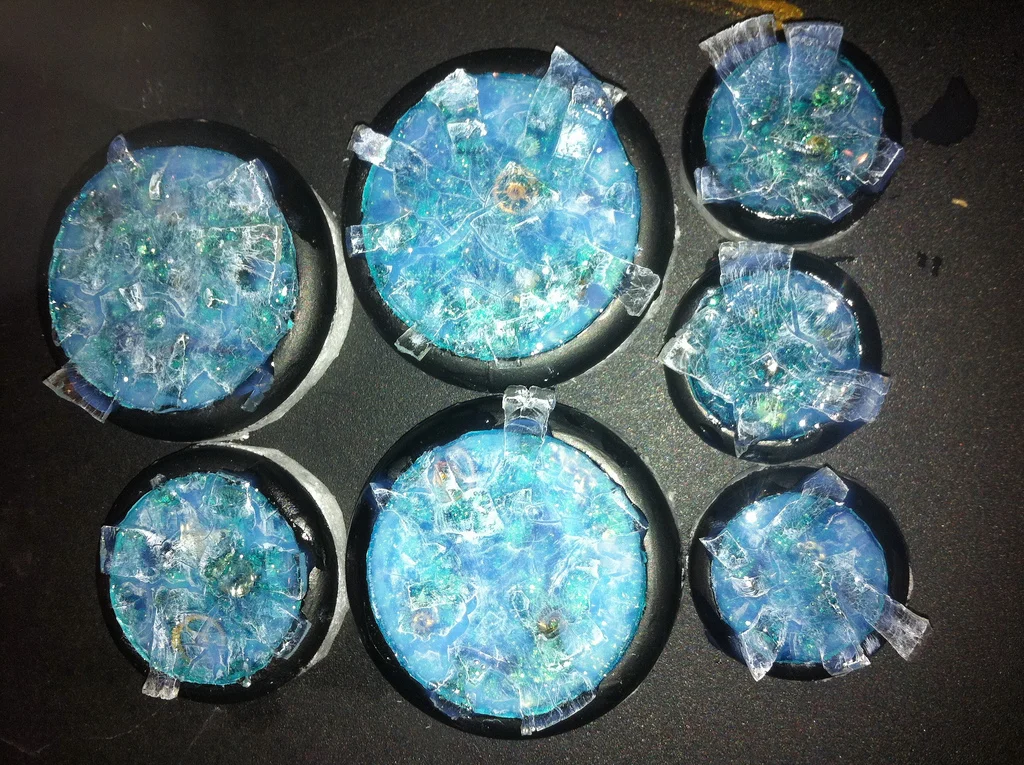
Step 5) place these ice shapes around your base

afarm8.staticflickr.com_7231_6971276298_377932981a_b.webp


Step 6) pour crackle paint into base until level, this will glue in the ice chunk pieces you placed on your base. The paint is really a thick like gel so you can maneuver and adjust as necessary. When it dries it will all look like "one piece" and the already hardened ice chunks will not be so easily distinguishable. Notice that the crackle paint will not shrink much, it will just crack. This means you want it to fill the base all the way to the top or even slightly above the top depending on how you want your base to look.

Step 7) let dry 24 hours

Step 8 (optional) ) You can do another layer of crackle paint if you wish, depending on how you want your ice to look. If you opt for this step I would do Steps 1 and 2 from Part IV prior to adding the next layer of crackle paint.

Step 9) Paint the base and foam board black

Part IV --- Finishing and Adding Details

You will need:
a) white paint
b) blue / green / purple wash
c) gloss varnish
d) woodland scenics water effects (a thick white gel that will dry clear)

Step 1) wash a thin coat of your choice of wash into the cracks that have formed when the crackle paint dried

Step 2) dry brush white ... use VERY little paint and take your time, its better to do few coats instead of messing up as by now its taken 3 days to complete this project. Notice that the glitter is very subdued at this point, but still adds just a bit of sparkle. The more you dry brush the more opaque your ice will be, so play around to get the color you want.

Example small sized base:
afarm9.staticflickr.com_8141_6984270388_e21169b92b_b.webp


Example medium sized base:
afarm8.staticflickr.com_7117_7130351879_92ffa94988_b.webp


Step 3) apply a thin coat of gloss varnish

Step 4) You can mark the front arc of your base with the woodland scenics water effects. To do this apply a medium line of the gel around the front arc. Using a toothpick "pull" the gel down to about half to the bottom of the base. Mark the sides of the arc by pulling the gel all the way to the bottom. Mark the middle of the arc by pulling the gel all the way to the bottom. This will make icicles!

afarm8.staticflickr.com_7047_7123179323_611c8f804e_b.webp


Step 5) Let dry 24 hours! Notice the gel is white, this makes it easy to see what you are doing when you are making the icicles in Step 4. It will dry clear! Do not mess with it until its clear!

Step 6) Apply a thin coat of the wash of your choices to the icicles on the front arc.

Step 7) Dry brush the icicles with white paint.

afarm9.staticflickr.com_8148_6984254076_8ddec263e6_b.webp
 
RE: new to the forums and a WIP shot

So for my seaforge polar explorar dwarves (for warmachine) I had small watch parts in the ice, I figure for VC you can have zombies partially submerged or crawling out of the ice! I want to do filler bases of 5x2 regular troops. I will have all 10 zombies, but I want to have maybe 1/2 to 2/3 of them in various stages of being encased in the ice. Same for skellies.

These were made using the round bases, but same principle applies for the square GW bases. I will probably buy thin plastic sheets for the bottom instead of the 1/4 inch I used for warmachine due to the differing LOS rules and not needing to mark the front arc. Other than that everything else should work out just fine.

Comments and feedback are welcome!
 
RE: new to the forums and a WIP shot

Johnny-Crass said:
Stealing this for my warmachine:thumbsup:

Awesome! let me know how it turns out or if you have any questions. I also highly suggest doing them in batches as everything takes AGES to dry :(
 
RE: new to the forums, WIP shots, and now a Ice Base tutorial

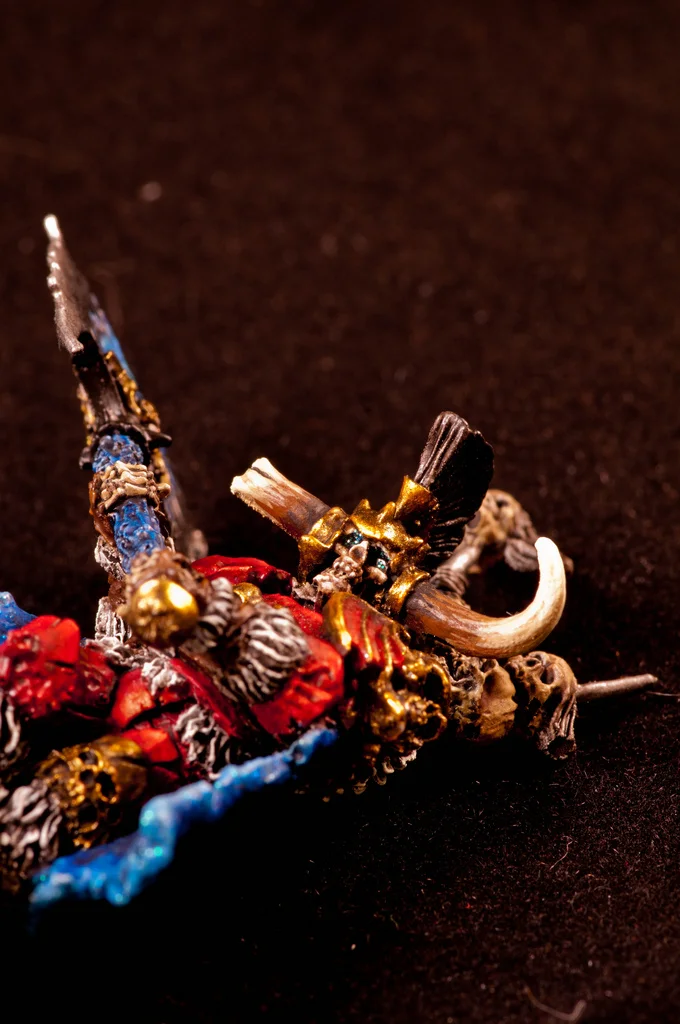
ok now some REAL pictures of Krell (did a bit more work)


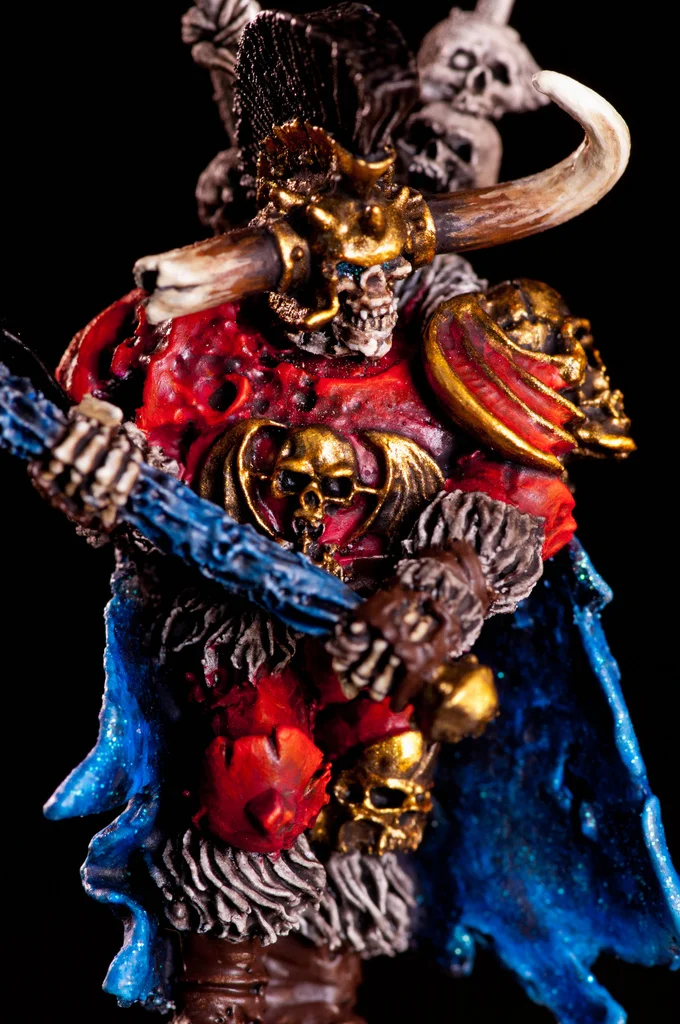
First off a semi direct light shot to show off Krell's eyes, they are painted with micro-glitter to give an real "glow"
afarm6.staticflickr.com_5457_7366298430_15644f51b2_b.webp


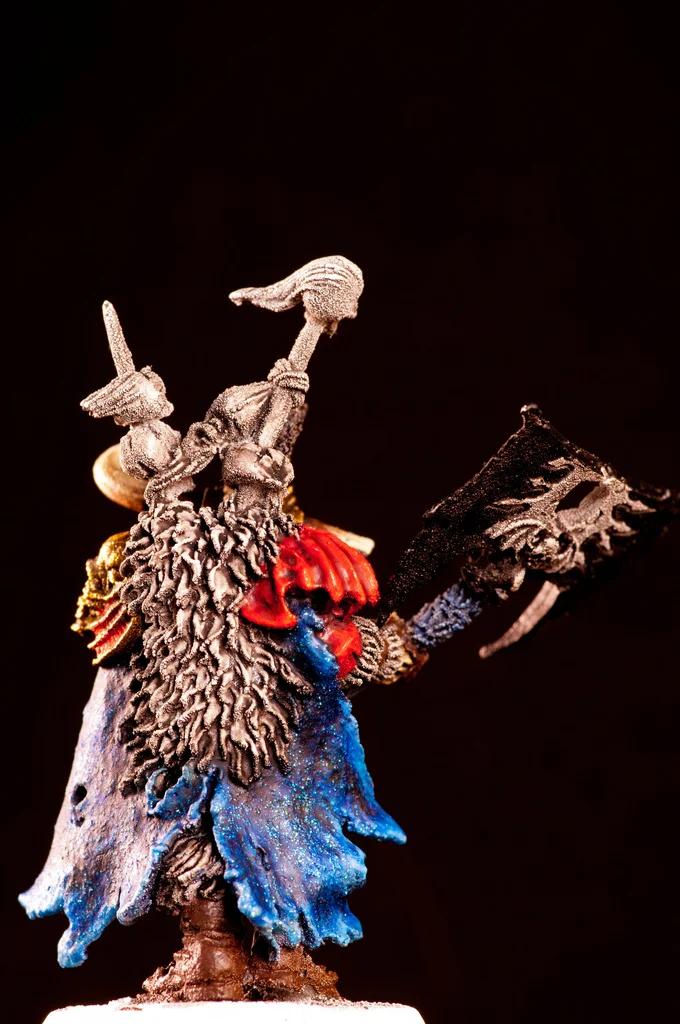
Cloak of eternal starlight detail shot (still need to paint his fur) .... and you can see where my primer fuzzed the model a bit ... :(

afarm6.staticflickr.com_5112_7366299160_1f7232d733_b.webp


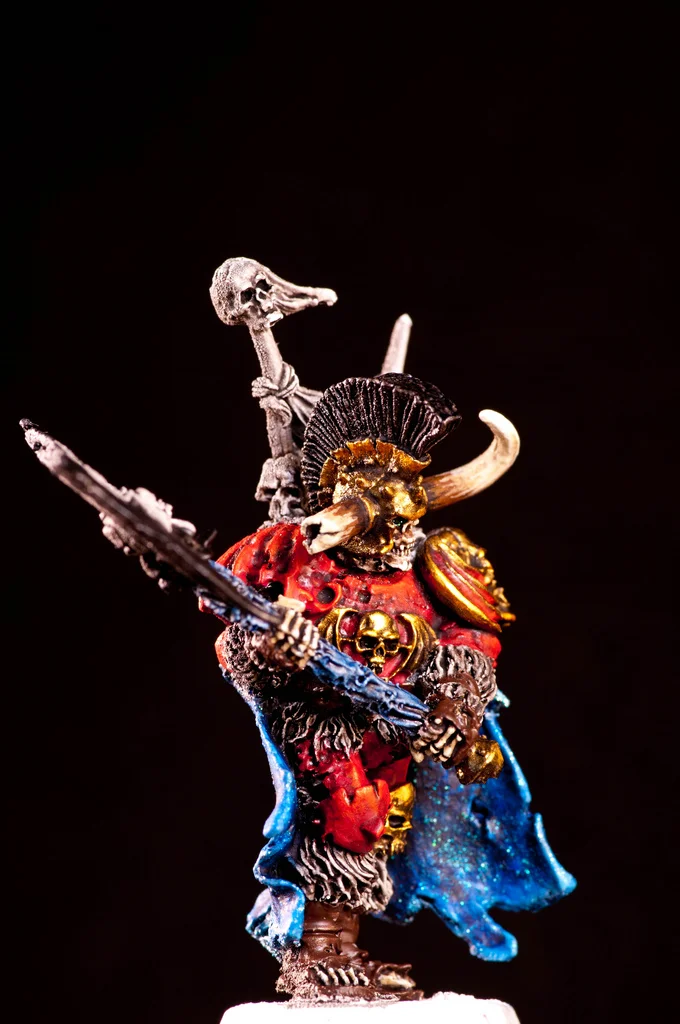
Just a cool angle

afarm8.staticflickr.com_7078_7366299756_0d8d43f708_b.webp


Detail shot, apparently he is a bit dusty so I need to brush him off .... this is the downside of macro lenses :P

afarm8.staticflickr.com_7086_7181073149_495c17349e_b.webp


so what do you guys think? comments / suggestions?
 
RE: new to the forums, WIP shots, and now a Ice Base tutorial

The tutorial is ace! (ice?)

The axe seems a little bent, something to do with finecast? Otherwise very nice work. The glitter effect is nice on the cloak, I wouldn't advice using it on vampires though. ;)
 
RE: new to the forums, WIP shots, and now a Ice Base tutorial

Santawraith said:
I can't wait to do my own krell, yours looks wonderful,

I am hoping that you will post your tutorial in our how to base your models thread it is amazing to see your style.

How to base

Sure I can post it there, could you pm me where I can find that thread? Is it ok that the content will be duplicated across posts (some forums are really anal about that).

EDIT **** NM I found where to post it :) it was in your post ;)
 
RE: new to the forums, WIP shots, and now a Ice Base tutorial

I really like the glitter/starry night effect you've gone for on Krell's cloak. And, damn dude, those ice bases? I'm speechless. They're perfect.
 
RE: new to the forums, WIP shots, and now a Ice Base tutorial

Wow... nice tutorial... I think I'm gonna try it too!
 
RE: new to the forums, WIP shots, and now a Ice Base tutorial

Great! If you guys have any question on it let me know!
 
RE: new to the forums, WIP shots, and now a Ice Base tutorial

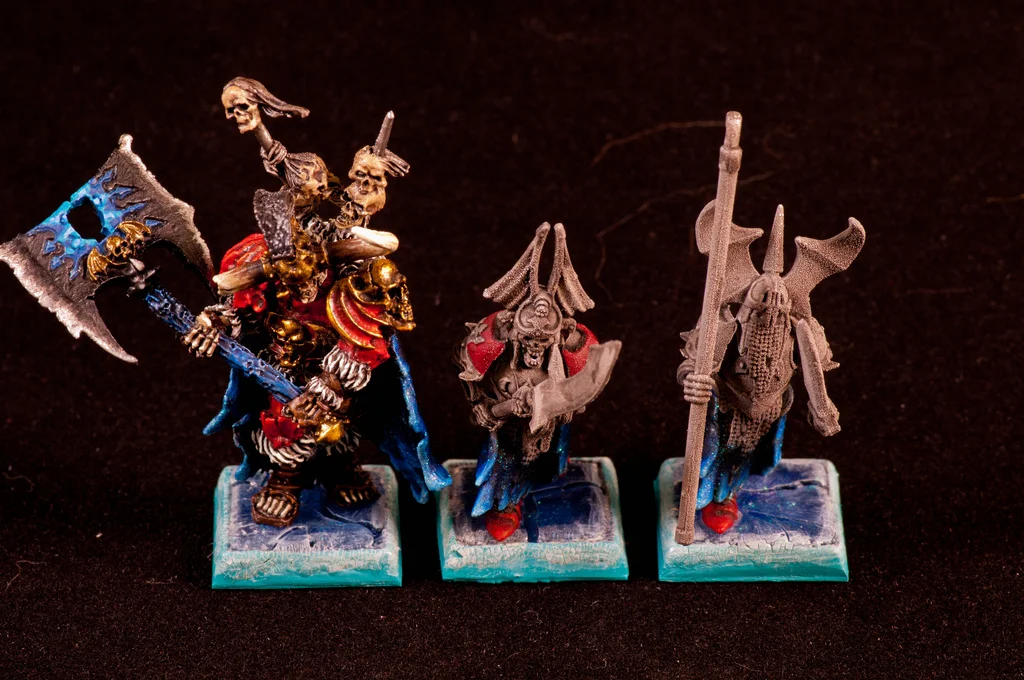
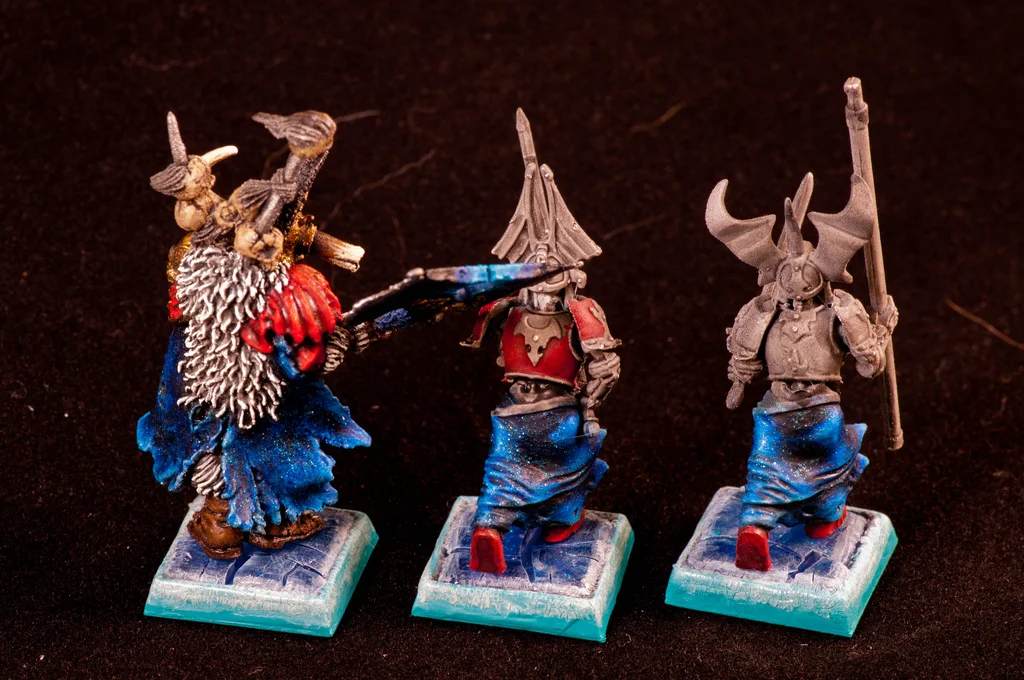
Krell update WIP shots, worked on the fur, shading the leather, started the axe, and tinkered with the horns a bit. I am pretty set that this will be the theme for my VCs: red armor, starlight cloaks, dark leathers, and gold accents. I also started the next batch of ice bases, this time warhammer ones :) C&C welcome, my feelings dont get hurt!

afarm8.staticflickr.com_7092_7188608173_c509c0ceeb_b.webp

afarm6.staticflickr.com_5195_7373842128_b93fc1060e_b.webp

afarm8.staticflickr.com_7243_7373842836_0056c1a2c6_b.webp

afarm8.staticflickr.com_7224_7373842428_10c7333e29_b.webp
 
RE: new to the forums, WIP shots, and now a Ice Base tutorial

A bunch of WIP shots of my GG (Krell will be used as their champion, and not as himself)

afarm8.staticflickr.com_7119_7422607792_e81458b33a_b.webp

afarm9.staticflickr.com_8145_7422608992_bb831fdbbe_b.webp

afarm8.staticflickr.com_7136_7422609722_005ed9ca9a_b.webp

afarm8.staticflickr.com_7277_7422610550_41b45f0730_b.webp

afarm8.staticflickr.com_7133_7422611340_1e20dace17_b.webp

afarm9.staticflickr.com_8158_7422612240_c67da495fe_b.webp
 

About us

  • Our community has been around for many years and pride ourselves on offering unbiased, critical discussion among people of all different backgrounds. We are working every day to make sure our community is one of the best.

Quick Navigation

User Menu