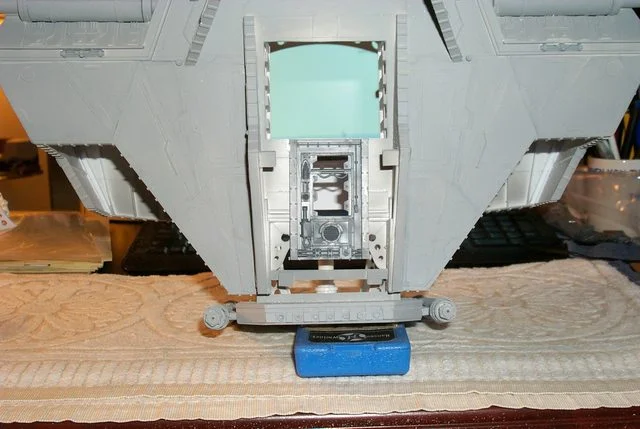

Blackadders WIP Warlord Titan
- Thread starter The_Blackadder
- Start date
-
The masquerade of murder returns! A new game of Vampires Amongst Us has begun. Unmask the killers, trust no one, and try to survive the night. Find out more and sign up now!
You are using an out of date browser. It may not display this or other websites correctly.
You should upgrade or use an alternative browser.
You should upgrade or use an alternative browser.


Think Space Marines Inquistor Titan:

Inner Workings Update
Hi Blackadder here; I took a few day off to plan where I was going on this and decided to work a bit on the interior as I have run out of ideas on the exterior.
Fortunately this model is so big and complex that I can jump from one area to another and still keep fresh on inspiration resolving detail.
I went back to my CoD scrap and found vents and conduit, push buttons and panel and fantastic ducting that lend itself to the ultimate consummation of this model.
Serendipity reared its ugly head in the for of the chimneys of the Manufactorum model gave me ducting to the condensers of the reactor coolant; a fortuitous accident that worked better than if I planned it.
http://i.imgur.com/6HAP4pd.jpg
Note the huge duct that exhausts (unfortunately over the view window). This leads to the condenser that cools the radioactive coolant for recycling through the reactor. ''PURE LUCK, NOT AT ALL PLANNED!''
http://i.imgur.com/jrhTdSX.jpg
Inner Workings Update
Hi Blackadder here; I took a few day off to plan where I was going on this and decided to work a bit on the interior as I have run out of ideas on the exterior.
Fortunately this model is so big and complex that I can jump from one area to another and still keep fresh on inspiration resolving detail.
I went back to my CoD scrap and found vents and conduit, push buttons and panel and fantastic ducting that lend itself to the ultimate consummation of this model.
Serendipity reared its ugly head in the for of the chimneys of the Manufactorum model gave me ducting to the condensers of the reactor coolant; a fortuitous accident that worked better than if I planned it.
http://i.imgur.com/6HAP4pd.jpg
Note the huge duct that exhausts (unfortunately over the view window). This leads to the condenser that cools the radioactive coolant for recycling through the reactor. ''PURE LUCK, NOT AT ALL PLANNED!''
http://i.imgur.com/jrhTdSX.jpg
What a difference some gray makes
To paraphrase an old song.................
I started priming the interior and under the carapace and it really breaths some life into this construct; gray being a much more contrast bearing colour than white.......
We'll start with the interior construction of the reactor chamber (with the reactor removed for clarity you can see to the other side wall the various controls on the mezzanine level and the major ducting for the condenser grid that cools the radioactive coolant.
http://i.imgur.com/TF5XYQ9.jpg

http://i.imgur.com/597AsUi.jpg
In the image below I displayed the left side interior for clarity
http://i.imgur.com/m9ZNDnF.jpg

And the left side exterior so the following images make sense
http://i.imgur.com/9yRxZ23.jpg
To paraphrase an old song.................
I started priming the interior and under the carapace and it really breaths some life into this construct; gray being a much more contrast bearing colour than white.......
We'll start with the interior construction of the reactor chamber (with the reactor removed for clarity you can see to the other side wall the various controls on the mezzanine level and the major ducting for the condenser grid that cools the radioactive coolant.
http://i.imgur.com/TF5XYQ9.jpg
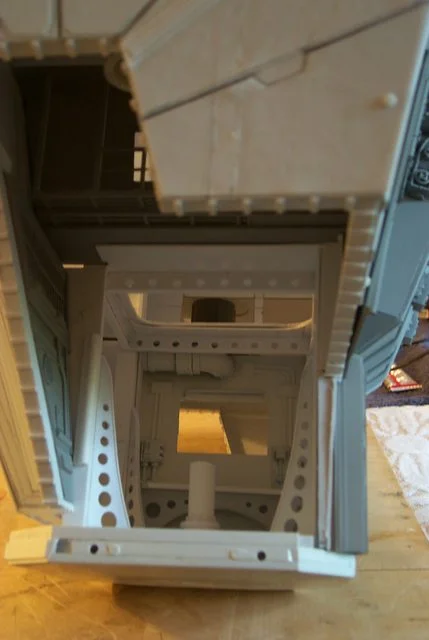
http://i.imgur.com/597AsUi.jpg
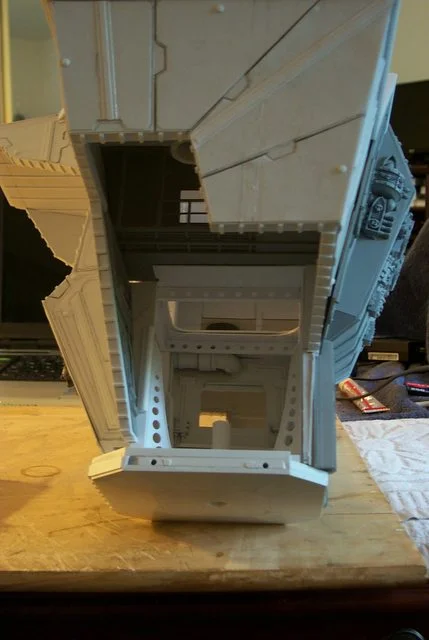
In the image below I displayed the left side interior for clarity
http://i.imgur.com/m9ZNDnF.jpg
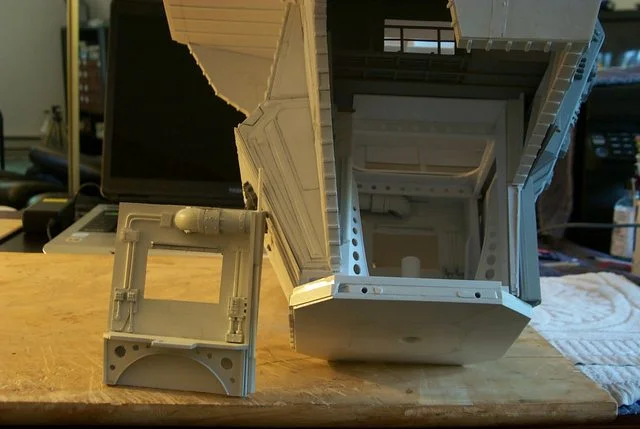
And the left side exterior so the following images make sense
http://i.imgur.com/9yRxZ23.jpg
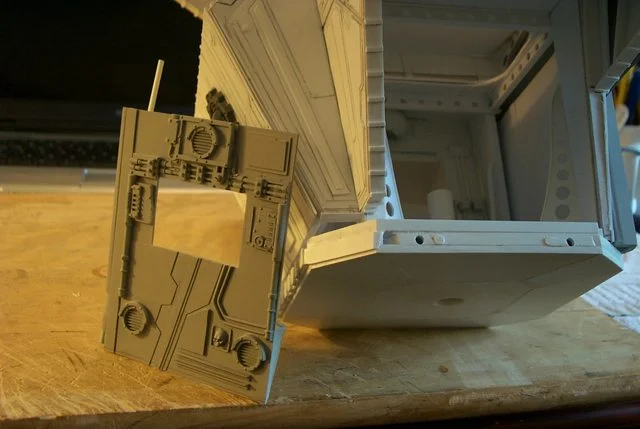
Under the Carapace
In continuation of the above post showing the right side exterior wall in place the interior ducting powered blower ducts air to the condenser grid much as the radiator works in your car. This cools the reactor coolant. A bit of license is taken as the duct doesn't actually connect to the radiator as the side panel is on a hinge that swings open for interior viewing because if it can't be seen all this work is wasted.
http://i.imgur.com/HWlYvg2.jpg
The rest is just the same albeit with a coat of primer. The rear backpack now has a purpose; it is now the heat exchanger that transfers the superheated primary (and radioactive coolant energy to the secondary steam jacket which in turn drives the turbines (which will be in the top deck i.e. above the command deck )
http://i.imgur.com/eYnNOGB.jpg
The backpack panel right now is just held in place by friction but ultimately will be secured with hidden screws..............
http://i.imgur.com/e81YIWR.jpg
In continuation of the above post showing the right side exterior wall in place the interior ducting powered blower ducts air to the condenser grid much as the radiator works in your car. This cools the reactor coolant. A bit of license is taken as the duct doesn't actually connect to the radiator as the side panel is on a hinge that swings open for interior viewing because if it can't be seen all this work is wasted.
http://i.imgur.com/HWlYvg2.jpg
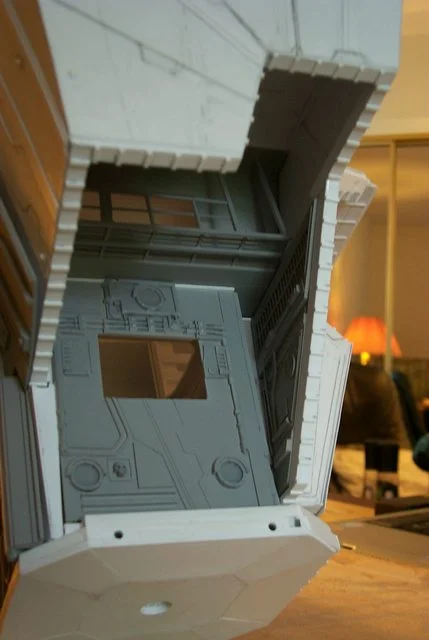
The rest is just the same albeit with a coat of primer. The rear backpack now has a purpose; it is now the heat exchanger that transfers the superheated primary (and radioactive coolant energy to the secondary steam jacket which in turn drives the turbines (which will be in the top deck i.e. above the command deck )
http://i.imgur.com/eYnNOGB.jpg
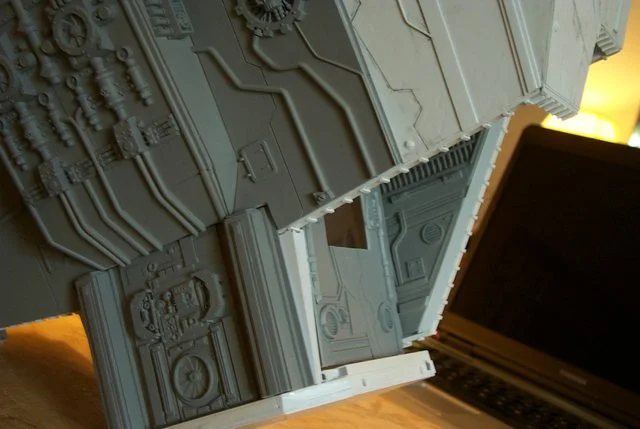
The backpack panel right now is just held in place by friction but ultimately will be secured with hidden screws..............
http://i.imgur.com/e81YIWR.jpg
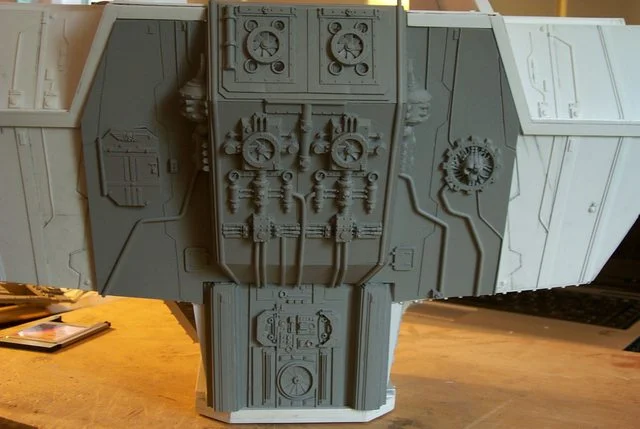
Scrap Heap!
I was working on this last night and I happened to look at the edge of my desk and there were all the parts helter skelter in what looks to be a scrap pile.....
http://i.imgur.com/MTyoE4w.jpg
And I thought to myself, ''A fine way to treat all that work!''

I was working on this last night and I happened to look at the edge of my desk and there were all the parts helter skelter in what looks to be a scrap pile.....
http://i.imgur.com/MTyoE4w.jpg
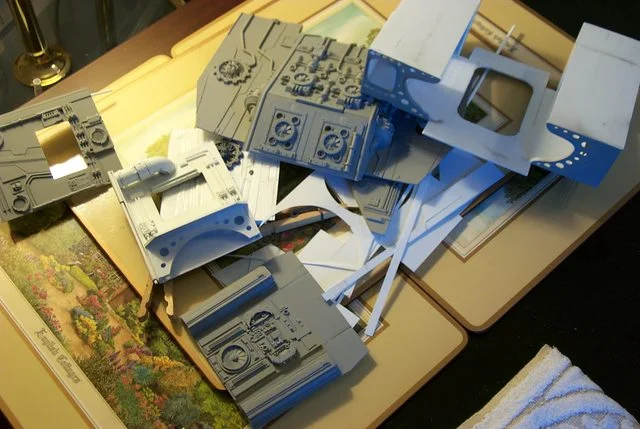
And I thought to myself, ''A fine way to treat all that work!''
CoD Bitz
Once again after a bout with a computer virus, lawn mower, installing a door in my kitchen and adjacent mouldings I have taken up the cudgel of building Luteus Vexant........... strange how menial trivialities take precedence over that which is of true import.
I resume the task by supplementing my dwindling supply of prefabricated bitz to detail the areas of the carapace that seem too sparsely decorated.
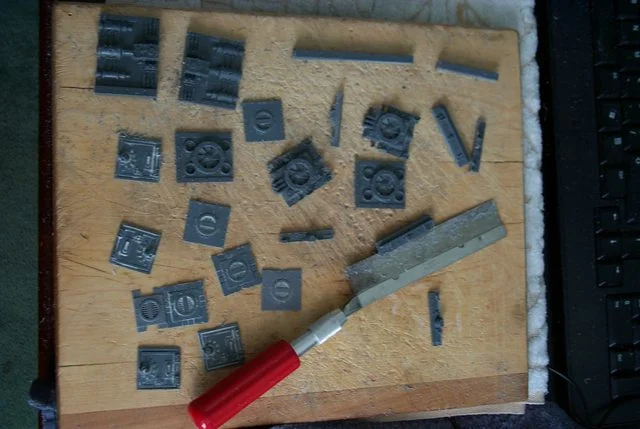
The CoD kits I have been cannibalizing are still providing ample fodder for my demands because I prudently have conserved both front and back of each floor and wall panels by by splitting them in half through the thickness axis with a razor saw instead of just sanding off the reverse face of the panel thereby doubling my inventory of parts and saving myself thirty bucks for another Manufactorum.
http://i.imgur.com/l3Q1Pj9.jpg
Once again after a bout with a computer virus, lawn mower, installing a door in my kitchen and adjacent mouldings I have taken up the cudgel of building Luteus Vexant........... strange how menial trivialities take precedence over that which is of true import.
I resume the task by supplementing my dwindling supply of prefabricated bitz to detail the areas of the carapace that seem too sparsely decorated.
The CoD kits I have been cannibalizing are still providing ample fodder for my demands because I prudently have conserved both front and back of each floor and wall panels by by splitting them in half through the thickness axis with a razor saw instead of just sanding off the reverse face of the panel thereby doubling my inventory of parts and saving myself thirty bucks for another Manufactorum.
http://i.imgur.com/l3Q1Pj9.jpg
Catching a Mold Relief
I am trying a new method of casting
I intend to make a gantry for the Warlord diorama showing it parked alongside for service/repairs. This will make a huge model display stand.
I'm using 'Sculpey' mold material to make a few more A M skulls for the aft end of the main guns.
Since 'Sculpey' is heat hardened I am trying to cold mold 5 minute epoxy directly on the soft uncured clay relying on it's heat resistant properties to not lose detail as the resin heats and cures
Below you see the mold that only required seconds to make once you sculpt the original:
I am trying a new method of casting
I intend to make a gantry for the Warlord diorama showing it parked alongside for service/repairs. This will make a huge model display stand.
I'm using 'Sculpey' mold material to make a few more A M skulls for the aft end of the main guns.
Since 'Sculpey' is heat hardened I am trying to cold mold 5 minute epoxy directly on the soft uncured clay relying on it's heat resistant properties to not lose detail as the resin heats and cures
Below you see the mold that only required seconds to make once you sculpt the original:
Catching a Mold Relief 2
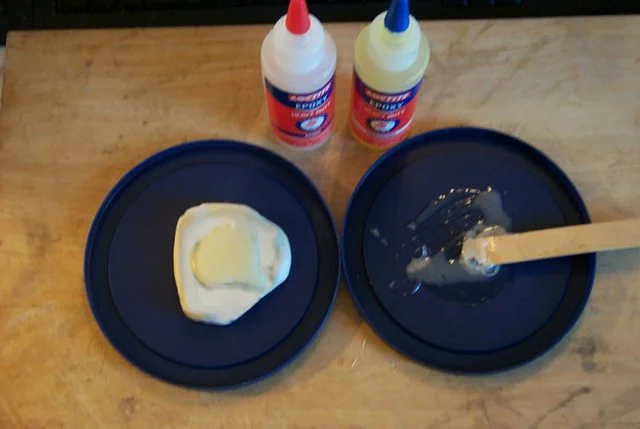
At the risk of redundancy I include the mixing and applying the 5 minute epoxy to the soft clay. I refrigerated the clay to accelerate the cooling before drizzling the resin mixture into the mold.
the slow application of resin allows the air to be evacuated from the recesses as the resin slowly flows through the mold thereby eliminating air bubbles............... I hope:
http://i.imgur.com/wJNbsuh.jpg
At the risk of redundancy I include the mixing and applying the 5 minute epoxy to the soft clay. I refrigerated the clay to accelerate the cooling before drizzling the resin mixture into the mold.
the slow application of resin allows the air to be evacuated from the recesses as the resin slowly flows through the mold thereby eliminating air bubbles............... I hope:
http://i.imgur.com/wJNbsuh.jpg


Yeah, I'm cheap!
Actually I'm experimenting with this product to see what it can do.
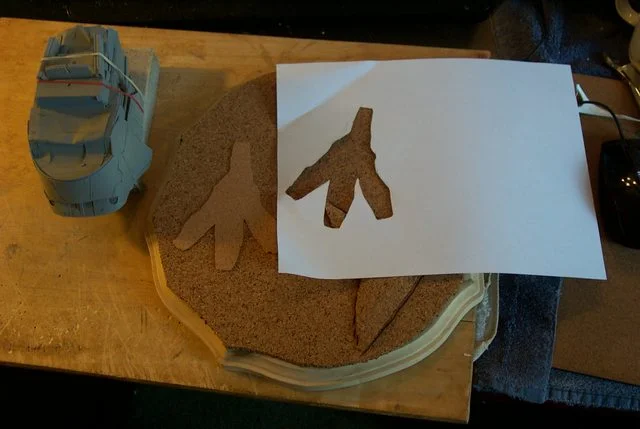
I have in mind to make bases for Lucie and some of the Baneblades where I want to make tread marks and foot pad marks. I also have in mind to make a Chaos Warlord with contoured carapace and need to practice rounded shoulders in the mode of the Chaos Decimator

Actually I'm experimenting with this product to see what it can do.
I have in mind to make bases for Lucie and some of the Baneblades where I want to make tread marks and foot pad marks. I also have in mind to make a Chaos Warlord with contoured carapace and need to practice rounded shoulders in the mode of the Chaos Decimator
Irons in the Fire
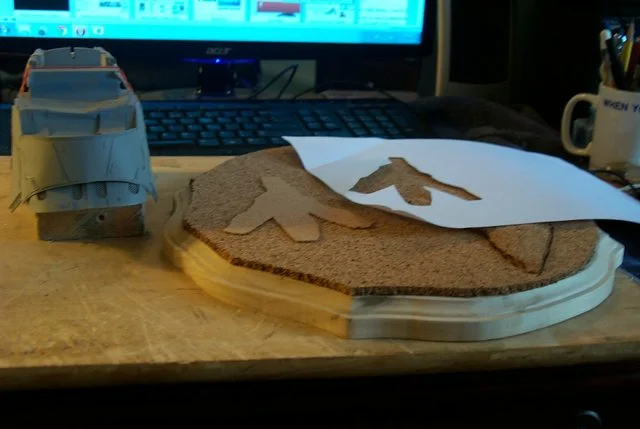
Granted I have 'way too many irons in the fires what with the Warlord, T'hawk, refurbishing my Superheavy Armour and now a display stand for Lucie but a full plate keeps you young to mix my metaphors.
The basic display stand for Lucie and the forward cowl for Luteus basic primed
http://i.imgur.com/i2Q7DMl.jpg
http://i.imgur.com/snEfMnu.jpg
What's with all the L's Blackadder?
Granted I have 'way too many irons in the fires what with the Warlord, T'hawk, refurbishing my Superheavy Armour and now a display stand for Lucie but a full plate keeps you young to mix my metaphors.
The basic display stand for Lucie and the forward cowl for Luteus basic primed
http://i.imgur.com/i2Q7DMl.jpg
http://i.imgur.com/snEfMnu.jpg
What's with all the L's Blackadder?
Moulded Skulls
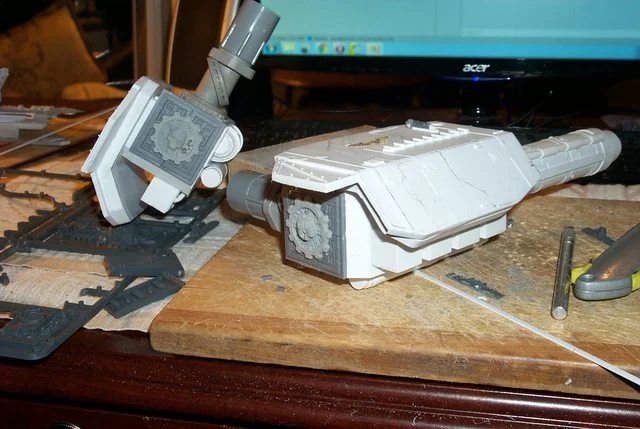
Well the moulded skulls can out not too shoddy good enough for the relatively hidden area under the carapace at the rear of the cannons. I sanded the left one a bit much but once painted I think it will pass. The Skulpey clay did a good job and will work fine for the terrain that I plan for the Warhound. I just wanted to see how well it would work for casting.
http://i.imgur.com/gwMF5pd.jpg
Well the moulded skulls can out not too shoddy good enough for the relatively hidden area under the carapace at the rear of the cannons. I sanded the left one a bit much but once painted I think it will pass. The Skulpey clay did a good job and will work fine for the terrain that I plan for the Warhound. I just wanted to see how well it would work for casting.
http://i.imgur.com/gwMF5pd.jpg
Main Weapon Detail
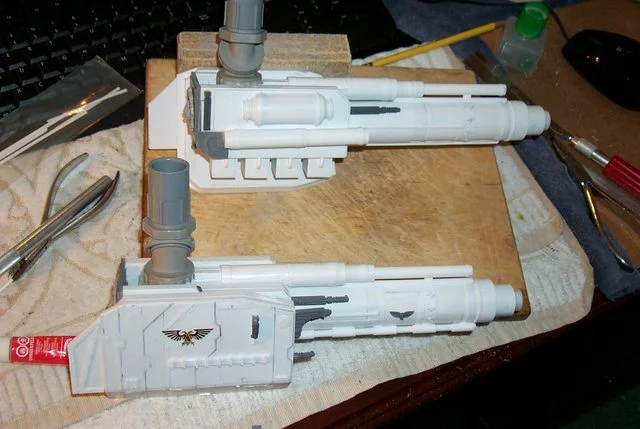
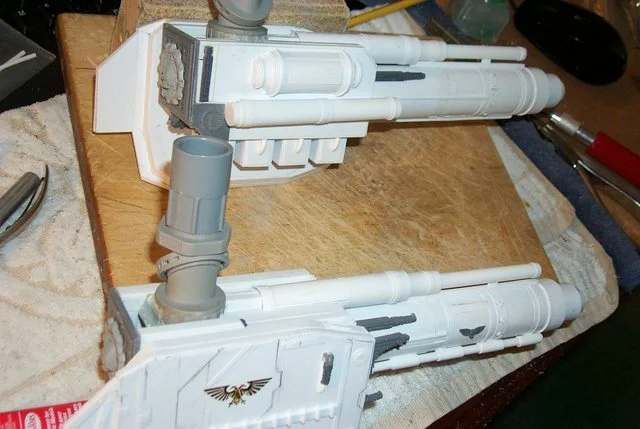
I keep adding detail to these guns and the more I add the more empty space I find to clutter up so after these photos I'm applying a coat of primer and see where I stand.
http://i.imgur.com/IMaaEY3.jpg
http://i.imgur.com/MFyFotd.jpg
http://i.imgur.com/nDiHNbG.jpg
BTW I have added much more detail than the original so the camouflage does do something; it increases the illusion of detail.
I keep adding detail to these guns and the more I add the more empty space I find to clutter up so after these photos I'm applying a coat of primer and see where I stand.
http://i.imgur.com/IMaaEY3.jpg
http://i.imgur.com/MFyFotd.jpg
http://i.imgur.com/nDiHNbG.jpg
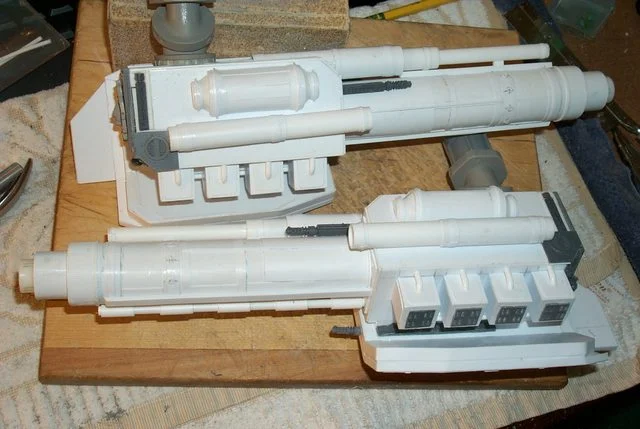
BTW I have added much more detail than the original so the camouflage does do something; it increases the illusion of detail.
The Relativity of Bland
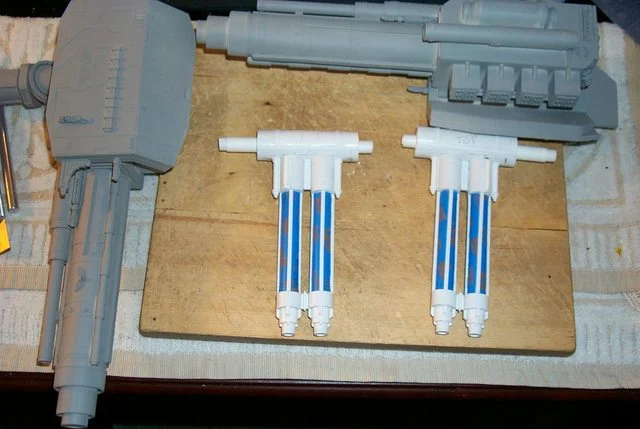
Well paint doesn't seem to help much everything looks so so bland. It seems there should be more patches and panels, definitely more skulls and aquila perhaps a few banners and those badges with ribbons dangling from them 'What are they called the name escapes me.
Ah! 'Purity Seals' never mind..............
Anyway the secondary weapons are masked for priming and I'm pretty satisfied with them.
http://i.imgur.com/sZqUY2c.jpg
Well paint doesn't seem to help much everything looks so so bland. It seems there should be more patches and panels, definitely more skulls and aquila perhaps a few banners and those badges with ribbons dangling from them 'What are they called the name escapes me.
Ah! 'Purity Seals' never mind..............
Anyway the secondary weapons are masked for priming and I'm pretty satisfied with them.
http://i.imgur.com/sZqUY2c.jpg
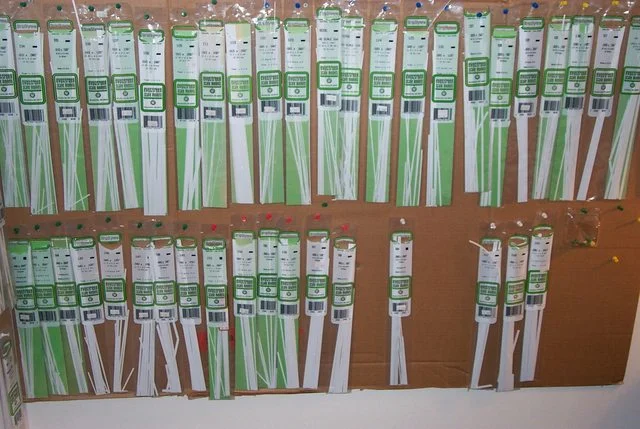
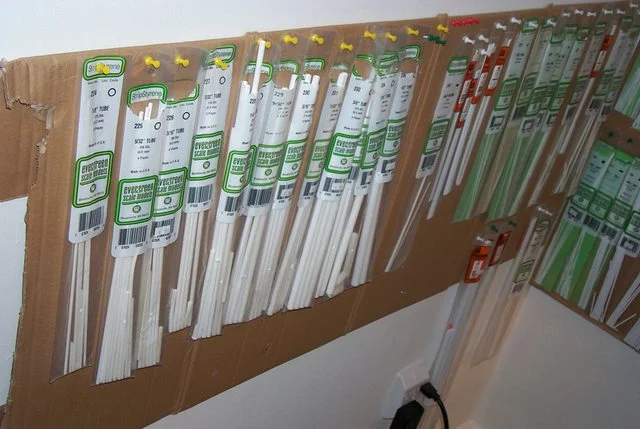
Yet another request of my source of styrene on another forum so I am going to be up front and reveal my larder.
Over the course of a few years I have accumulated quite an inventory of styrene strips and sheets mainly by investing about twenty bucks a month into increasing my reservoir of material.
I won't lie to you on the face of it it is a tremendous outlay of cash for an inventory of this size and Evergreen won't spring for a display carousel for a noncommercial site even though I regularly extol their product.
http://www.evergreenscalemodels.com/
In addition I have researched wholesale distributors of styrene sheets which is by far the biggest single outlay of cash for material. I found a local one in an Industrial park that supplies my requirements.
Now that I have all the styrene I need I routinely spend about 20 bucks a month to keep my supply sufficiently abundant.
http://i.imgur.com/EQ6hqeb.jpg
http://i.imgur.com/AncsaYm.jpg
Over the course of a few years I have accumulated quite an inventory of styrene strips and sheets mainly by investing about twenty bucks a month into increasing my reservoir of material.
I won't lie to you on the face of it it is a tremendous outlay of cash for an inventory of this size and Evergreen won't spring for a display carousel for a noncommercial site even though I regularly extol their product.
http://www.evergreenscalemodels.com/
In addition I have researched wholesale distributors of styrene sheets which is by far the biggest single outlay of cash for material. I found a local one in an Industrial park that supplies my requirements.
Now that I have all the styrene I need I routinely spend about 20 bucks a month to keep my supply sufficiently abundant.
http://i.imgur.com/EQ6hqeb.jpg
http://i.imgur.com/AncsaYm.jpg
Surely you could just find some other carousel-like piece that could serve such a function? Seems like you could modify something without too much work to make it work, although those walls don't look like they are a poor solution at all.
And I am fairly sure you have more polystyrene than my local hobby shop :Vampire1: It's funny, I never questioned where you had all of it from, although I didn't think you had different sized strips or such, I thought you just cut larger sheets to size when you needed them? I guess strips are a fair bit more convenient, and probably more accurate.
And I am fairly sure you have more polystyrene than my local hobby shop :Vampire1: It's funny, I never questioned where you had all of it from, although I didn't think you had different sized strips or such, I thought you just cut larger sheets to size when you needed them? I guess strips are a fair bit more convenient, and probably more accurate.
Tawg said:.............. I never questioned where you had all of it from, although I didn't think you had different sized strips or such, I thought you just cut larger sheets to size when you needed them? I guess strips are a fair bit more convenient, and probably more accurate.
I originally bought boxcar siding and cut the strips from that as it is already scored but I found for this project required so many different sizes that I was forever cutting and sanding thin strips instead of working on the titan.
It became a matter of expediency to buy the precut strips and over the course of two years I amassed quite a variety. I kept the stock in a few buckets but found shuffling through the envelopes also ate up time so last month I mounted them on cardboard and was astounded at my inventory, hence the pictures.
The remark about the carousel was just a joke I think my selection system is more convenient.
A Mélange of Decor, Dispair, Decadence and Decay
Unfortunately using a flash washes out a good bit of detail especially the 0.010 inch/ 0.25 MM layered armour which hopefully washes will bring to the fore.
The new bitz is what I am debuting with this post and I am hoping that I have achieved the right degree of decoration, decadence and decay which permeates the desperate 40K future world much as western culture seems hellbent on the road to in the early 21st century.
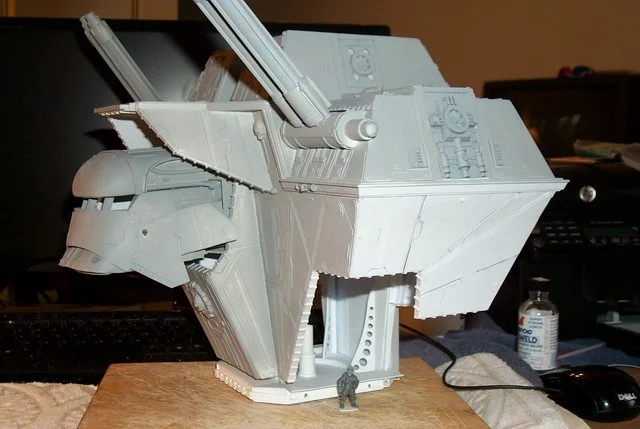
In this first image I show the new side detail of the carapace which is a melange of DS's bitz work and my interpretation thereof which is somewhat less busy and I hope makes more sense from an (totally bogus) engineering standpoint
Most prominent are the numerous vents and exhaust fans that I deem necessary to cool the vast heat producing engines necessary to animate this behemoth:
http://i.imgur.com/yPDioBi.jpg
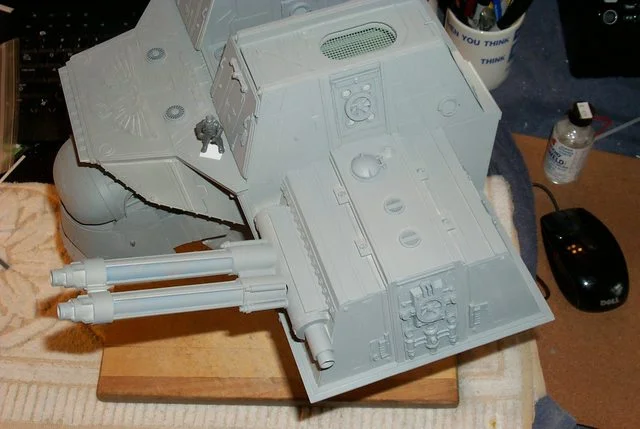
This image shows the top of the carapace showing the four adjunct shield relays and the two shoulder field regulator receivers one on either side of the carapace munitions exhaust fan:
http://i.imgur.com/JpvrJ8r.jpg
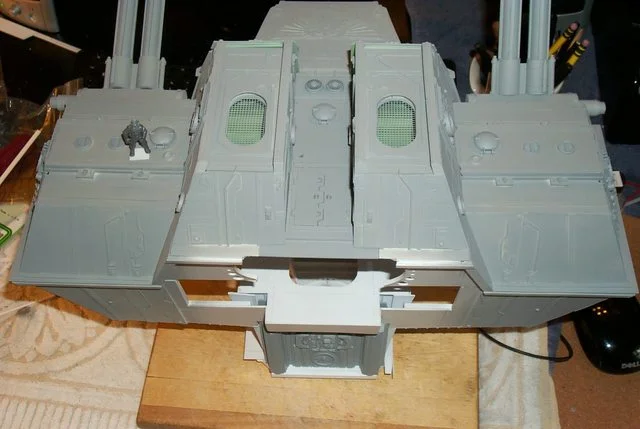
Top rear view showing the four rear shield relays and the four make up air inlets for cooling the carapace and sweeping stray radiation from the ammo magazines:
http://i.imgur.com/U3Fm1Ty.jpg
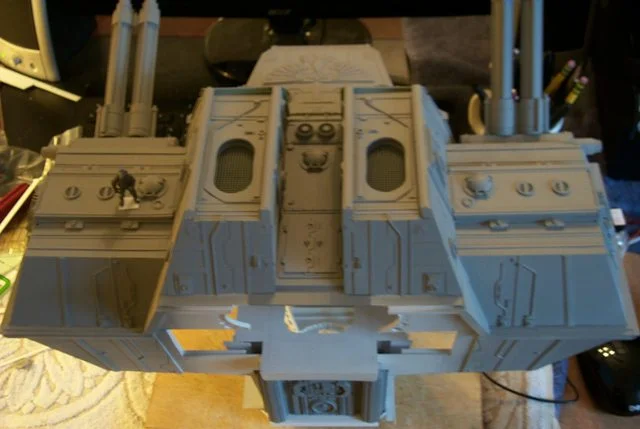
And an image sans flash to better show the new detail:
http://i.imgur.com/2X9UJET.jpg
Demonstrating that the Blackadder clearly needs to get a life or at the very least a better grip on reality...............
Unfortunately using a flash washes out a good bit of detail especially the 0.010 inch/ 0.25 MM layered armour which hopefully washes will bring to the fore.
The new bitz is what I am debuting with this post and I am hoping that I have achieved the right degree of decoration, decadence and decay which permeates the desperate 40K future world much as western culture seems hellbent on the road to in the early 21st century.
In this first image I show the new side detail of the carapace which is a melange of DS's bitz work and my interpretation thereof which is somewhat less busy and I hope makes more sense from an (totally bogus) engineering standpoint
Most prominent are the numerous vents and exhaust fans that I deem necessary to cool the vast heat producing engines necessary to animate this behemoth:
http://i.imgur.com/yPDioBi.jpg
This image shows the top of the carapace showing the four adjunct shield relays and the two shoulder field regulator receivers one on either side of the carapace munitions exhaust fan:
http://i.imgur.com/JpvrJ8r.jpg
Top rear view showing the four rear shield relays and the four make up air inlets for cooling the carapace and sweeping stray radiation from the ammo magazines:
http://i.imgur.com/U3Fm1Ty.jpg
And an image sans flash to better show the new detail:
http://i.imgur.com/2X9UJET.jpg
Demonstrating that the Blackadder clearly needs to get a life or at the very least a better grip on reality...............
What seat is this?
I found this in my son's bitz box and I was wondering if anyone can identify what kit it came from?


http://i.imgur.com/iMAJSGM.jpg
http://i.imgur.com/IzHXLN5.jpg
I found this in my son's bitz box and I was wondering if anyone can identify what kit it came from?
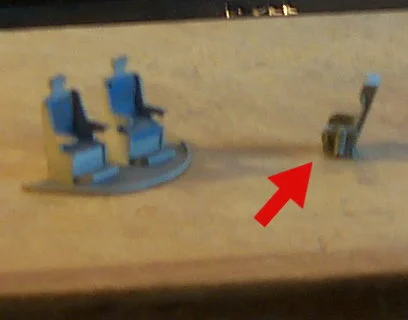
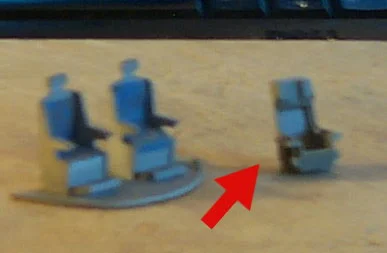
http://i.imgur.com/iMAJSGM.jpg
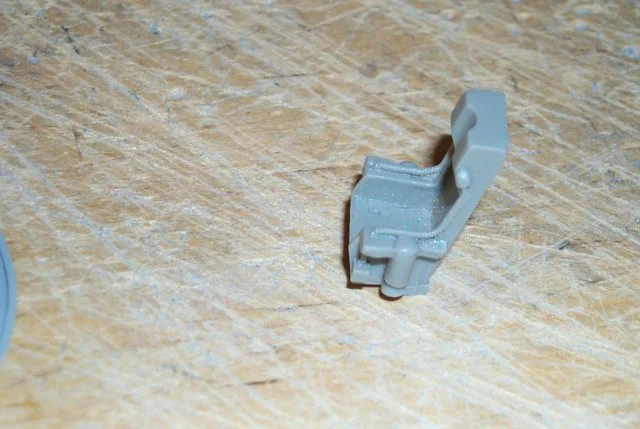
http://i.imgur.com/IzHXLN5.jpg
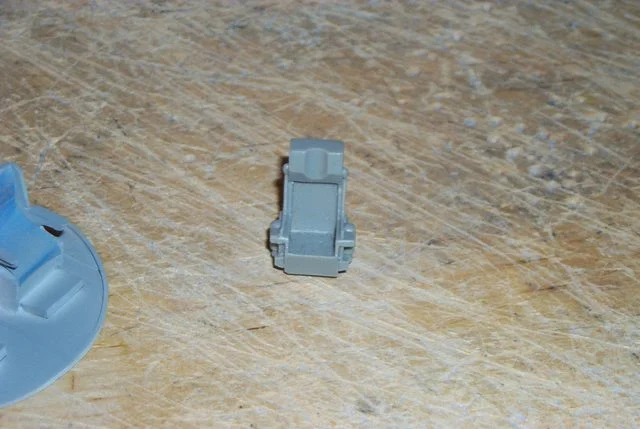
Warlord and Thunderhawk Seats
First let me thank all that responded to my query as to the origin of the cockpit seat I posted.
It turns out that it is the ejector seat (empty) that is included with the FW Lightning and Thunderbolt.
http://i.imgur.com/GLtcLyd.jpg
Warlord and Thunderhawk Seats
Besides the twin seats I made for the Warlord previously I am going to make 6 slightly oversized versions of the Lightning and Thunderbolt ejector seats for my Thunderhawk. Oversized to accommodate the rather robust SM physique.
A lesson to all, don't let your ol'lady trash yer bitbox ya might jest need some o' that crap some day.
First let me thank all that responded to my query as to the origin of the cockpit seat I posted.
It turns out that it is the ejector seat (empty) that is included with the FW Lightning and Thunderbolt.
http://i.imgur.com/GLtcLyd.jpg
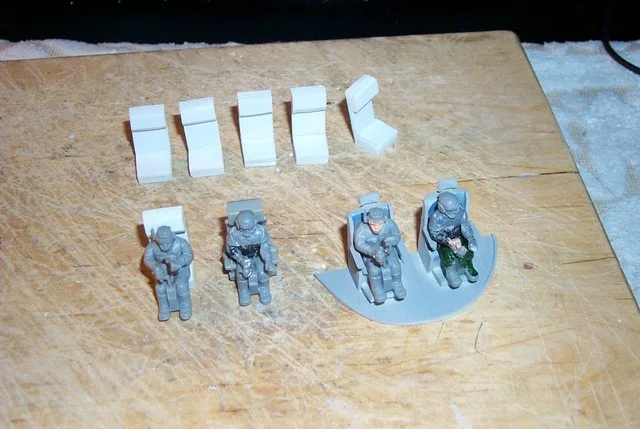
Warlord and Thunderhawk Seats
Besides the twin seats I made for the Warlord previously I am going to make 6 slightly oversized versions of the Lightning and Thunderbolt ejector seats for my Thunderhawk. Oversized to accommodate the rather robust SM physique.
A lesson to all, don't let your ol'lady trash yer bitbox ya might jest need some o' that crap some day.
Windscreens Applied
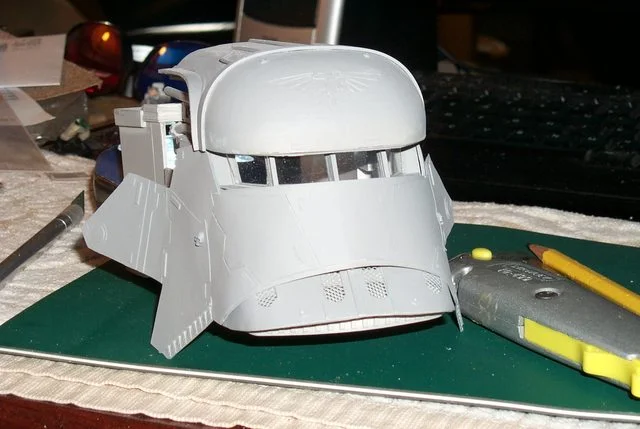
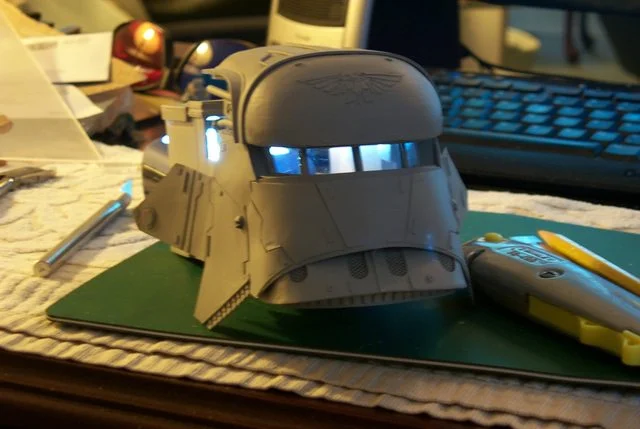
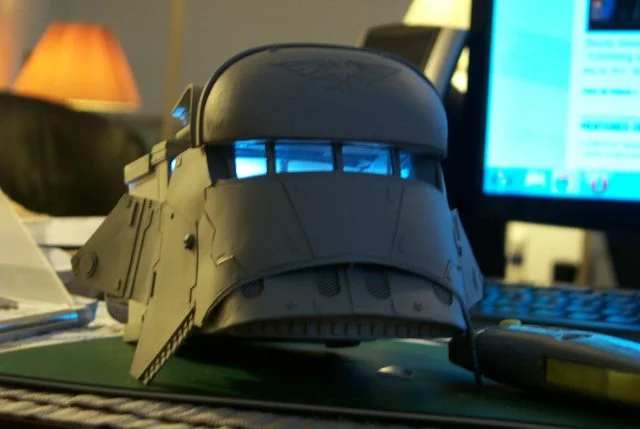
I know it might not seem that big a deal to some but installing windscreens on the delicate frame was a time consuming and frustrating operation. I made the panes out of 1.0 mm (0.040 inch) thick clear styrene hand shaped and sanded to a precise fit.
Each panel was slightly different in shape and size than its mirror panel but none were more than 0.5 mm which made me extremely pleased.
I hope the camera catches these panels I left the dust on and backlit them so they are visible.
http://i.imgur.com/yFdhSqI.jpg
http://i.imgur.com/kParXOz.jpg
http://i.imgur.com/QEGYX7m.jpg
I know it might not seem that big a deal to some but installing windscreens on the delicate frame was a time consuming and frustrating operation. I made the panes out of 1.0 mm (0.040 inch) thick clear styrene hand shaped and sanded to a precise fit.
Each panel was slightly different in shape and size than its mirror panel but none were more than 0.5 mm which made me extremely pleased.
I hope the camera catches these panels I left the dust on and backlit them so they are visible.
http://i.imgur.com/yFdhSqI.jpg
http://i.imgur.com/kParXOz.jpg
http://i.imgur.com/QEGYX7m.jpg
Shareya said:Pretty sure that seat is out of some toy airplane fighter.
No, it's out of a FW Lightning and the only reason I couldn't identify it is I had no access to the model.
Small Arms Defense
I strikes me that a Warlord Titan is at the mercy of ill-disposed enemy ground personnel. However powerful the Void shields are can they stop sappers and suicide bombers?
What is needed are defense small arms weapons firing down from 30 meters in the air relatively immune to reciprocal fire.
Therefore I am adding a fighting platform to the chest shield with egress to the second level of the lower Engineering deck.
Funny how this all seems to work out; the CoD blast doors fit perfectly into the opening beneath the head with minor alterations plus it gives purpose to the chest plate and fills the empty space in the lower engineering level.
Purists may baulk at this modification so they are welcome to omit this from their Warlord Titans.
Below is the Chest plate in place soon to be pierced with bolter loopholes.
http://i.imgur.com/m4PSsRJ.jpg
Cutting through the forward bulkhead for the blast door assembly.
http://i.imgur.com/kQK57a4.jpg
The exterior blast door in place
http://i.imgur.com/trx7k0g.jpg
I strikes me that a Warlord Titan is at the mercy of ill-disposed enemy ground personnel. However powerful the Void shields are can they stop sappers and suicide bombers?
What is needed are defense small arms weapons firing down from 30 meters in the air relatively immune to reciprocal fire.
Therefore I am adding a fighting platform to the chest shield with egress to the second level of the lower Engineering deck.
Funny how this all seems to work out; the CoD blast doors fit perfectly into the opening beneath the head with minor alterations plus it gives purpose to the chest plate and fills the empty space in the lower engineering level.
Purists may baulk at this modification so they are welcome to omit this from their Warlord Titans.
Below is the Chest plate in place soon to be pierced with bolter loopholes.
http://i.imgur.com/m4PSsRJ.jpg
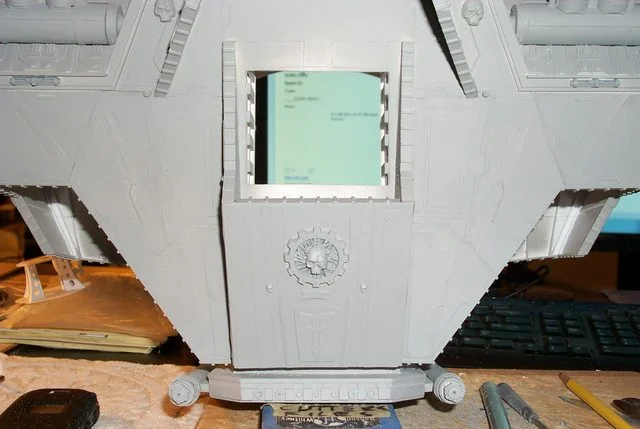
Cutting through the forward bulkhead for the blast door assembly.
http://i.imgur.com/kQK57a4.jpg
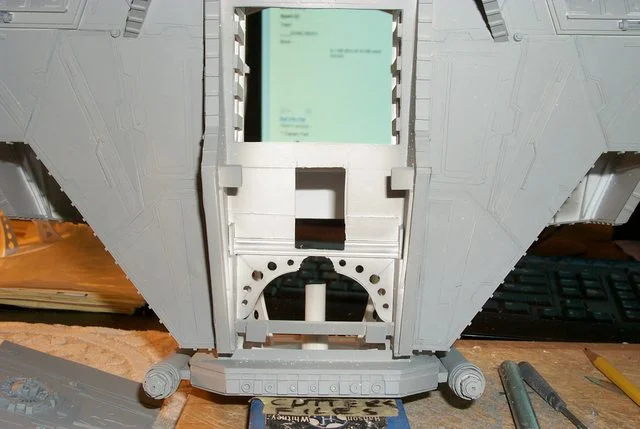
The exterior blast door in place
http://i.imgur.com/trx7k0g.jpg