Blackadders WIP Warlord Titan

  • The masquerade of murder returns! A new game of Vampires Amongst Us has begun. Unmask the killers, trust no one, and try to survive the night. Find out more and sign up now!
Diagonal Toes Tread

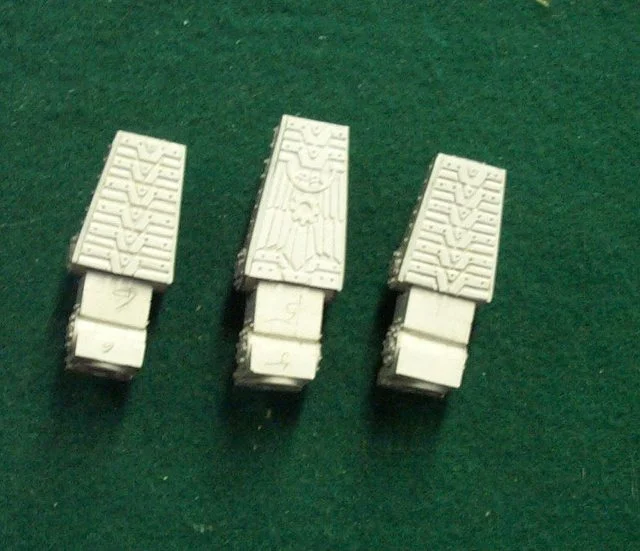
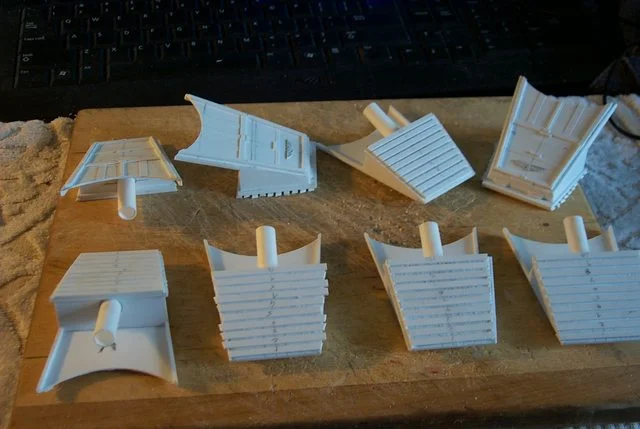
This morning, can't believe it's Saturday already, I began the diagonal toe treads. These I had envisioned as duplicating the tread on the Lucius Warhound:

http://i.imgur.com/xBRDkWy.jpg
ai.imgur.com_xBRDkWyl.webp


and may still do so but for now a more basic tread design will suffice.

http://i.imgur.com/1Hnc1Lc.jpg
ai.imgur.com_1Hnc1Lcl.webp


By leaving the center of each strip unglued I can modify the center delta pattern at a later date.
 
With respect to the above reply; I ruefully state the following:

Bland and Uninspired!

Well this is rather disappointing. The feet with a homogeneous coat of primer look rather bland and uninspired. I am confronted with the alternatives either to add copious amounts of fiddly rivets and superfluous bits or busy the construction up with camouflage in the manner of Mr Smith.

http://i.imgur.com/XFOPRR5.jpg
ai.imgur.com_XFOPRR5l.webp


http://i.imgur.com/umWc66r.jpg
ai.imgur.com_umWc66rl.webp


Even the tread looks boring!
http://i.imgur.com/Ahl6n32.jpg
ai.imgur.com_Ahl6n32l.webp
 
I was referring to the first treads where they are diagonal you have designs built into them.

The plain horizontal ones are bland but if you won't see it because it will be standing on it there is not much point.


Finish the base of the feet before seeking to augment it with decoration.
|I think you are being over critical of your work however.
 
Sorry, I was referring to my last post where I stated that the diagonal toe tread was good enough for the time being. Not your reply for which I am appreciative.
 
Good for the sole

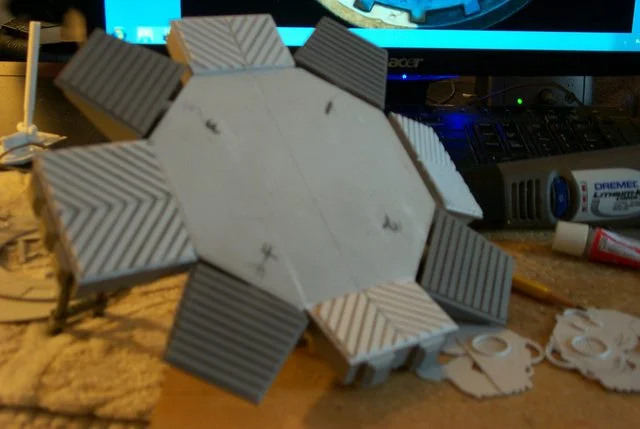
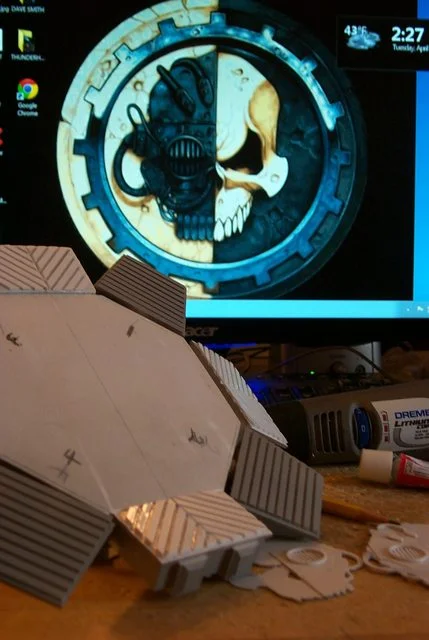
A little humility is good for the soul. In a weak moment I felt a bit depressed how plain the prime coat made the feet considering all the detail installed but it was pointed out that a little highlighting and inking will heighten the contrast. I'm still thinking that camouflage will dramatically augment the features of the model but plugging on never the less I added a Michelin tread pattern to the front and rear toes:

http://i.imgur.com/E1rVsBK.jpg
ai.imgur.com_E1rVsBKl.webp


and stuck on the A.M. emblem temporarily for a relative view.

I was in a quandary whether to make the A.M. symbol mirrored as some suggested to leave a reflected spoor (Track way):

http://i.imgur.com/xkPqF3z.jpg
ai.imgur.com_xkPqF3zl.webp


but since GW/FW are not in accord as to whether the tech side is on right or left why not both! Therefor the tread of the left foot will mirror the tread of the right foot and it's either half right or half wrong:

http://i.imgur.com/DOX3G0o.jpg
ai.imgur.com_DOX3G0ol.webp


Compromise is also good for the soul.
 
I had to post this. It's one of my all time favorite trailers from a scene that never made it to the movie it advertised.............

Go figure!

http://www.youtube.com/watch?v=4_oiHWXLIFI

IT's........................
 
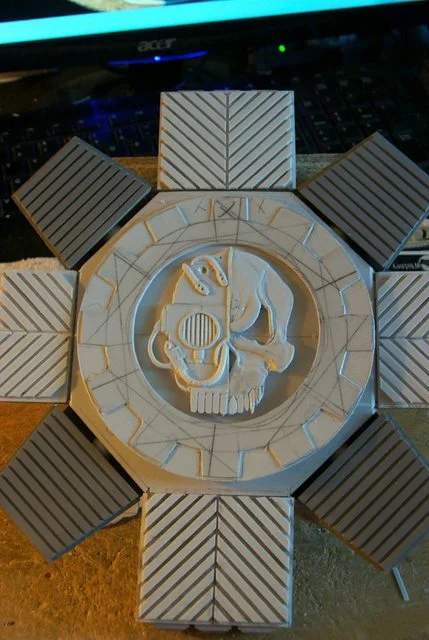
Skull Bas Relief

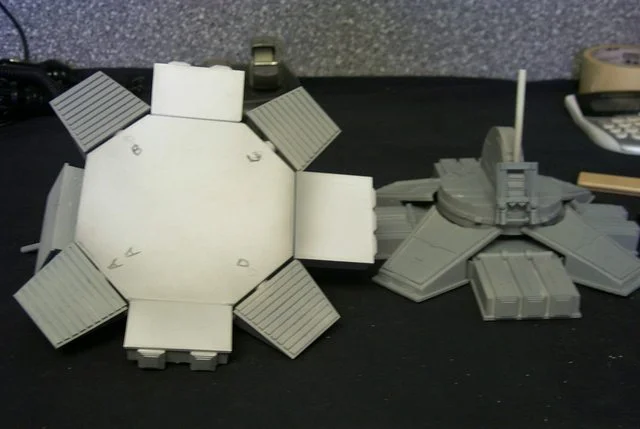
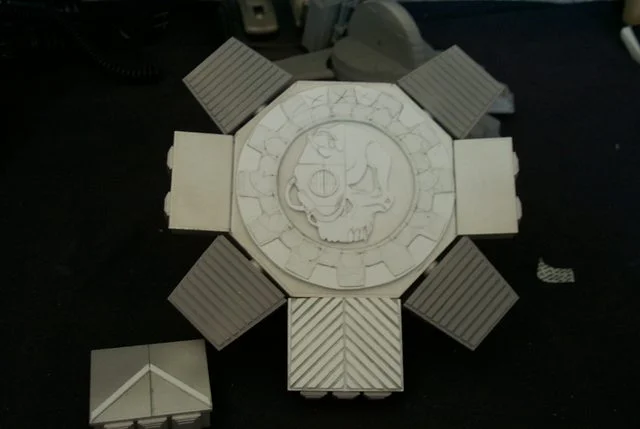
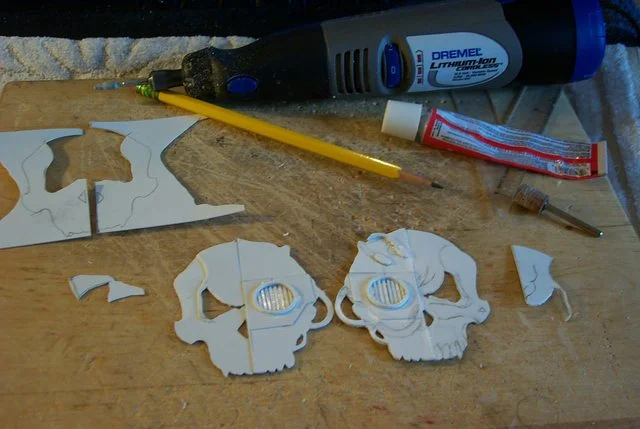
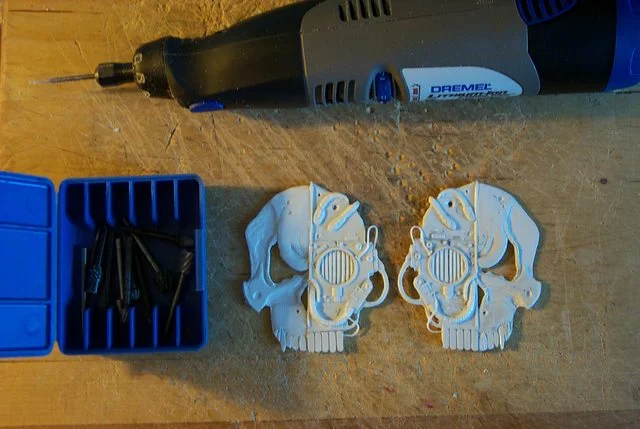
Here's a neat little problem when working on a project of limited depth; try to obtain that illusion in 0.5 MM..............

A bit of a ''follow along'' image:

http://i.imgur.com/4aWuxGD.jpg
ai.imgur.com_4aWuxGDl.webp


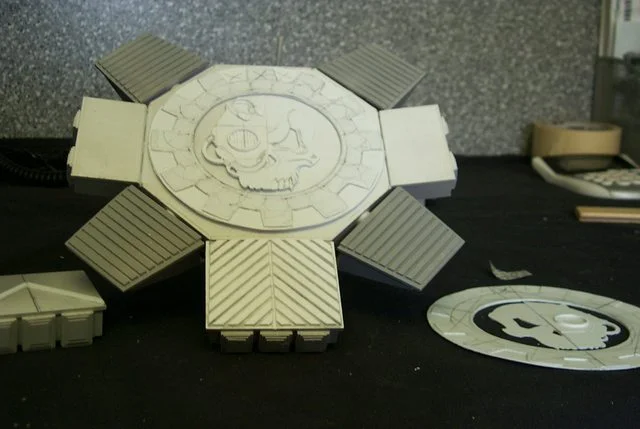
The foot pad with a more forgiving light although the image is slightly blurred:

http://i.imgur.com/5VgIOlH.jpg
ai.imgur.com_5VgIOlHl.webp


The tread design on the toes complete:

http://i.imgur.com/6J8rT2R.jpg
ai.imgur.com_6J8rT2Rl.webp


And the Death's Head wallpaper for reference:

http://i.imgur.com/MXTCv1J.jpg
ai.imgur.com_MXTCv1Jl.webp
 
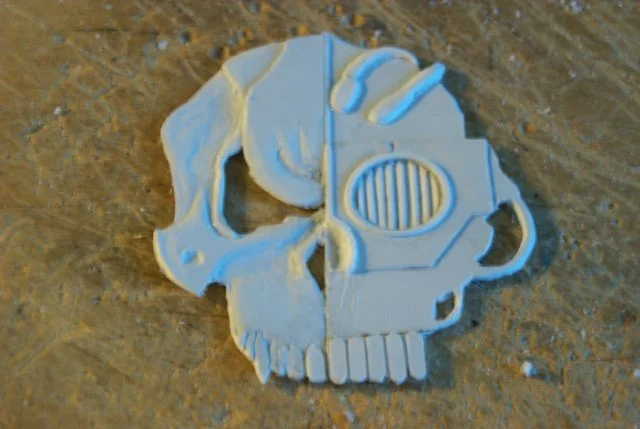
More Skull-duggery

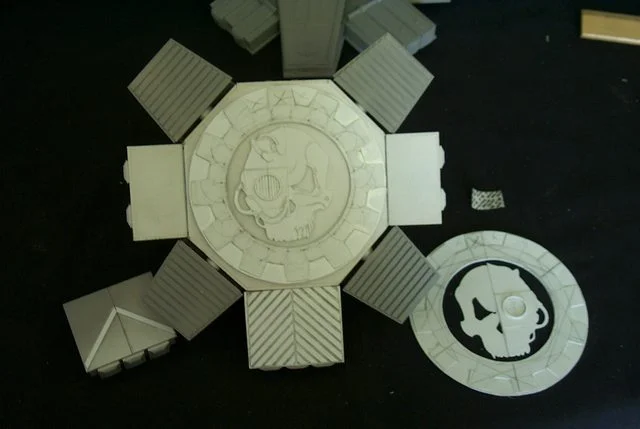
The logo that is most detailed............
http://i.imgur.com/dJ51h5D.jpg
ai.imgur.com_dJ51h5Dl.webp


The mirror is less further along:
http://i.imgur.com/JGdrw5W.jpg
ai.imgur.com_JGdrw5Wl.webp


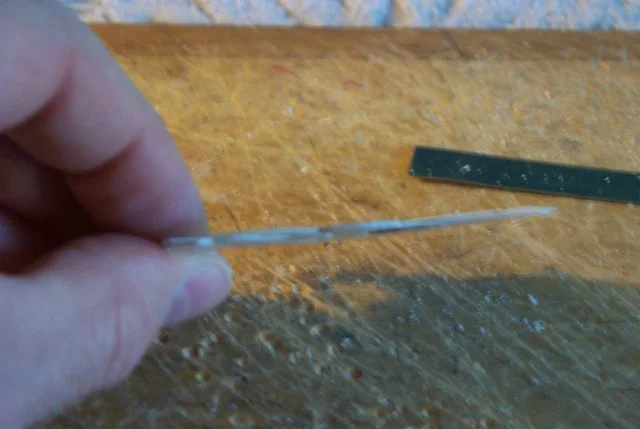
The thickness is at this moment 1,5 MM/0.060 inch Needs to be less:
http://i.imgur.com/Va0sU3A.jpg
ai.imgur.com_Va0sU3Al.webp


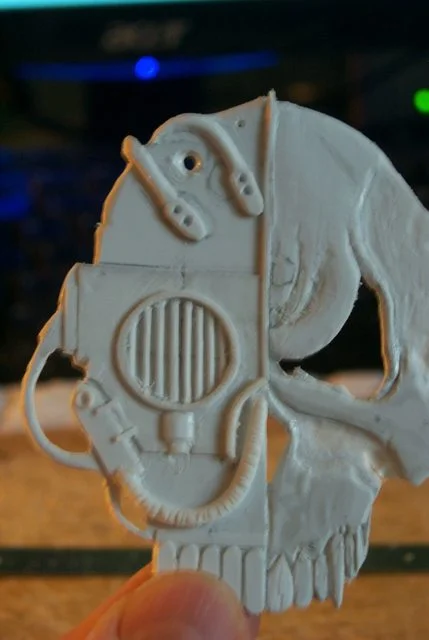
Close up reveals some fine cleanup is necessary:
http://i.imgur.com/MB7KmBS.jpg
ai.imgur.com_MB7KmBSl.webp
 
Tools of the trade

Aside from the obvious Xacto knife, nail files, needle files, etc........... the most necessary tool to make these reliefs was my cordless Dremel. I rarely use this tool but it's indispensable in a project such as this.

I have a good assortment of cutting files including some dental drills my dentist gave me; they were too worn out for dental work.

In all these foot treads took about a week; time well spent I believe and will complete the detail on the feet to my satisfaction.

http://i.imgur.com/codPBAZ.jpg
ai.imgur.com_codPBAZl.webp


Now on to detailing of the lower legs.
 
Advantages of screwing your Model


Not what you're thinking,

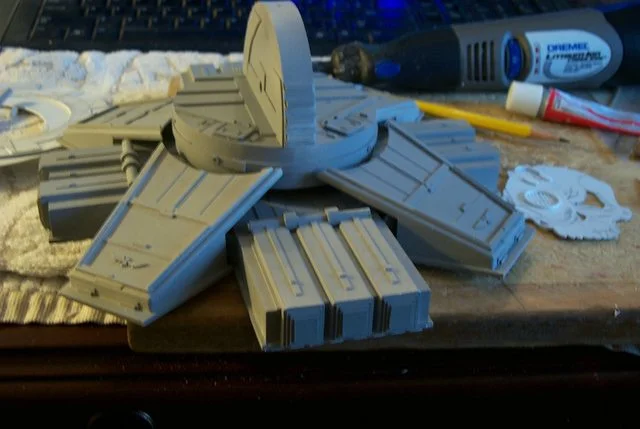
Below you can see the advantages of my construction technique. Many months ago I installed a bit of detail on the lower legs promising to return later in the construction to add the final appurtenances. By using screws and threading the adjacent styrene not only does it afford me an movable joint but allows me to disassemble the sub components to add further refinements. Were everything glued into a solid immovable mass this would be much more difficult and therefor modification nigh improbable.

Now at my leisure and a fresh outlook on what is needed to be done I can approach the lower legs (In this case) as a separate modeling project.

http://i.imgur.com/m2EAMbB.jpg
ai.imgur.com_m2EAMbBl.webp


http://i.imgur.com/ZFneRv1.jpg
ai.imgur.com_ZFneRv1l.webp


This is I feel a major clue to my building results.
 
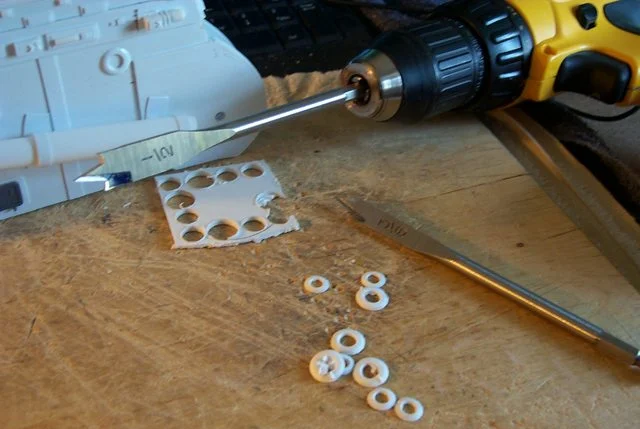
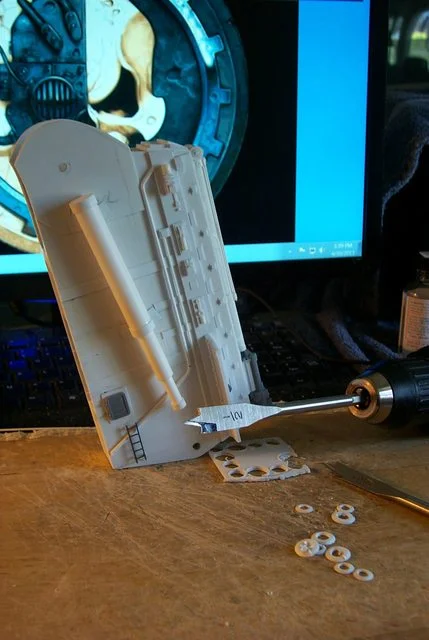
Donut Holes


Years ago a popular donut retailer came up with an idea to profit from selling waste. In the manufacture of cut donuts the 'hole' was scrap. Hey! sez a bright young proto-executive, why not fry the holes and market them? Hence the "munchkin" was born.
Employing that logic why not use the scrap styrene for interesting cryptic detail?

http://i.imgur.com/oCdoHu2.jpg
ai.imgur.com_oCdoHu2l.webp


Hence the styrene donut shape was born and I use it through out my Warlord as interesting esoteric bitz.

A few minutes with my portable drill and a piece of scrap 1,5 mm styrene and I have quite a few little tidbits to add to the leg assembly.

http://i.imgur.com/o2Pg65s.jpg
ai.imgur.com_o2Pg65sl.webp
 
Harder and Harder

It's getting harder and harder putting this thing back together as everything is hand made and fitted and my markings which identify the left leg components from the right leg components were obliterated by the paint.
http://i.imgur.com/w4gCFi5.jpg
ai.imgur.com_w4gCFi5l.webp


Aww poor baby Blackadder..............

Anyway the paint (primer) came out swimmingly and the extra detail is right in the ballpark in my estimation neither too much nor too little. Grey is certainly Luteus' colour, I had to make a Kmart run this morning to buy more primer. Great stuff only $1.59 a can and covers fantastic.
http://i.imgur.com/HBveRNA.jpg
ai.imgur.com_HBveRNAl.webp


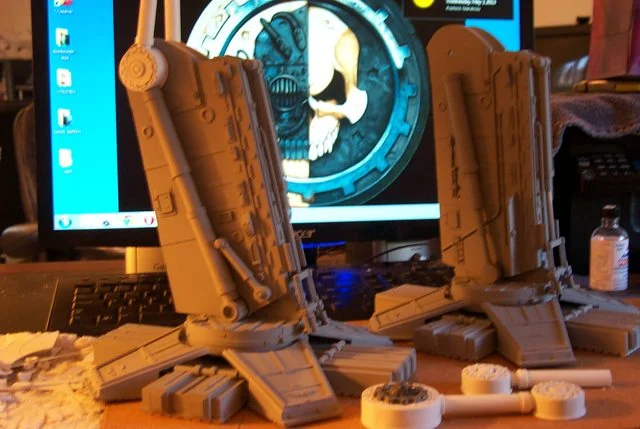
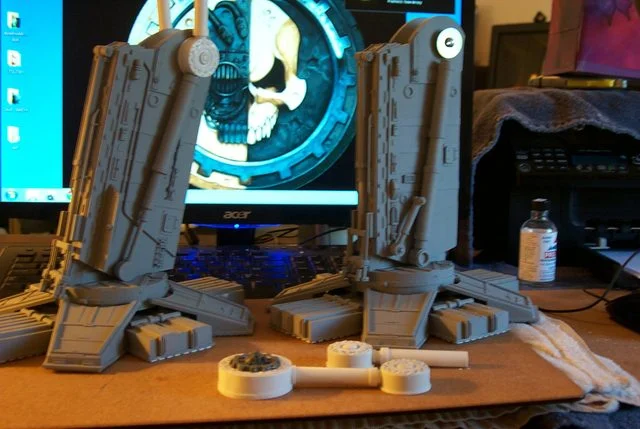
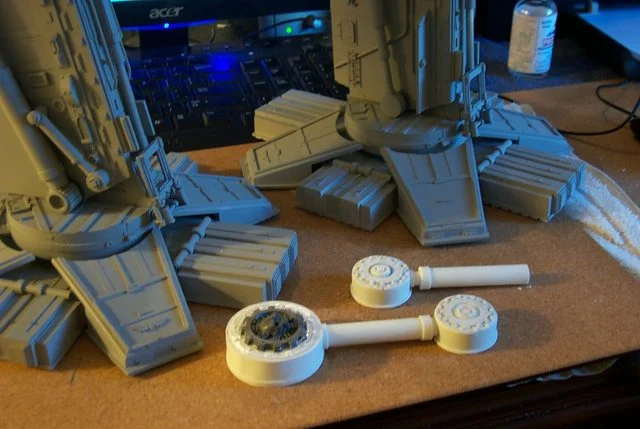
I detailed the "lollypop" screw covers with extra races and rivets (White pieces foreground) so they are done except for paint:
http://i.imgur.com/brbxCif.jpg
ai.imgur.com_brbxCifl.webp


Tomorrow I start on enhancing the detail on the upper legs.

As the Rabbi said, "It won't be long now!"
 
The Glass is Half Empty

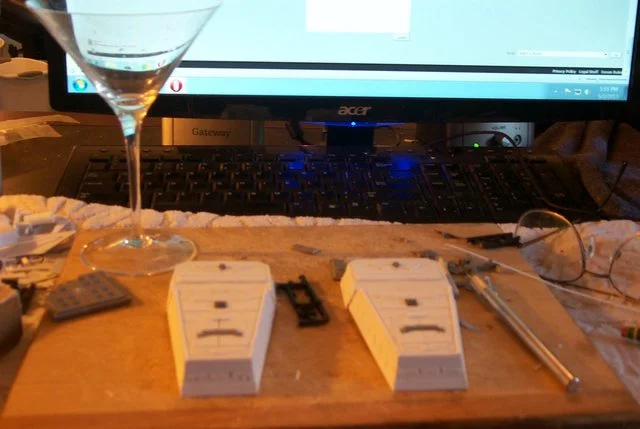
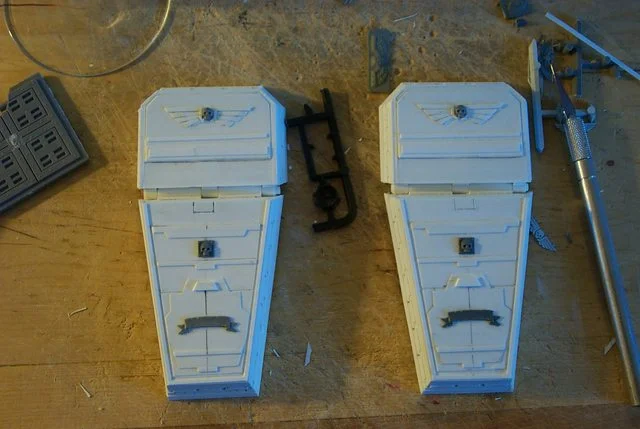
Actually completely empty and by no means is the Blackadder advocating imbibing demon Rum er Vodka but truth be known I cut and pasted both sets of over-sized flaming winged skulls under the influence of my daily triple Martini.

Note the focus!

http://i.imgur.com/1YCDVg2.jpg
ai.imgur.com_1YCDVg2l.webp


We're talking the white winged skulls at the top of the armour......
It will be interesting to see what these look like under the cold cruel light of dawn.

http://i.imgur.com/T0mxY0i.jpg
ai.imgur.com_T0mxY0il.webp


Anyhow the thigh guards are complete and ready for primer and may g-d have mercy on my soul.

--
E. Blackadder
 
Lower Legs Range of Motion

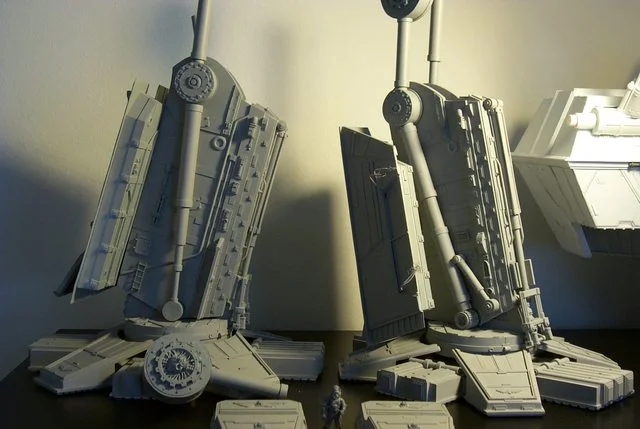
I thought to have these images posted before the majority of you depart for the weekend hiatus. Since the lower legs are primed and mounted in their respective final assembly I feel it's a good time to demonstrate the full range of motion capable by both legs. Each leg is positioned in their full extreme position the right leg in the full extended arc and the left leg in the full reflexive arc. Both legs are capable of these extremes and anything in between so I hope this forestalls anymore questions as to what static pose I will be attempting.

http://i.imgur.com/DjrBhKa.jpg
ai.imgur.com_DjrBhKal.webp


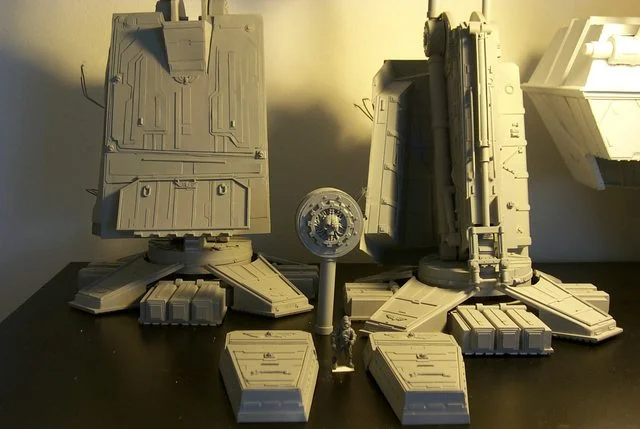
The greaves primed showing front and rear projections:

http://i.imgur.com/2D1vG7f.jpg
ai.imgur.com_2D1vG7fl.webp


Note the search light mount flaps are not installed until the lighting is completed.

I hope to have the upper leg sections final detailed, primed and assembled by the end of the weekend
 
A.M. Logo for lollypop

Thank the Emperor for the CoD Manufactorum kit. There is a wealth of detail to be gleaned the latest of which are the tiny A.M. logos on the unseen bottom of floor panels trap doors.

Using my half inch Xacto chisel I surgically shaved the upper half-gear and skull intact sanded the back smooth and removed the flash.

I next fabricated a scratch lower half-gear and installed on the small lower screw cap.

http://i.imgur.com/xklJclJ.jpg
ai.imgur.com_xklJclJl.webp

sorry for the poor image quality, something wrong with the macro setting.........

BTW the upper legs are done and the paint is drying, whew busy day; images to follow.
 
Waist Pelvic Block
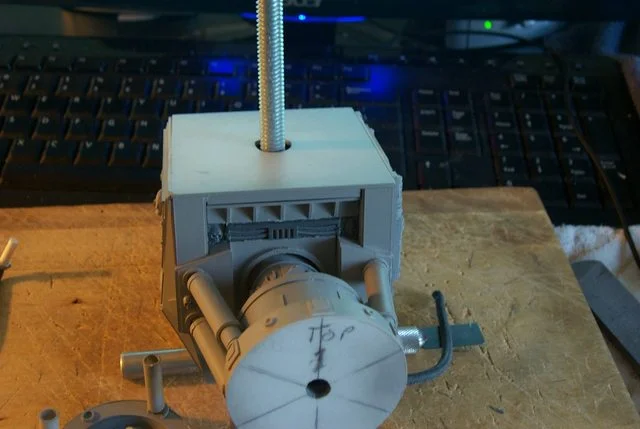
The waist of this beastie is the single most strong area of construction yet it is diminutive in size and almost delicate in construction.

Attempting to maintain the scale proportions of the Warlord yet provide the monster with an adequate set of hips was a real challenge. I eschewed the single steering cylinder for what I deemed necessary (minimum) for a vehicle of this size adding eight more cylinders to the construction at some cost to my faithfulness to the FW DS design but it has to be viable to me don't ya see; if I don't think it will work, it won't work............

http://i.imgur.com/AV2FyRS.jpg
ai.imgur.com_AV2FyRSl.webp


Anyway I built the pelvis as I thought fit and the devil take the conventional wisdom.

http://i.imgur.com/4aJtCf0.jpg
ai.imgur.com_4aJtCf0l.webp


Seeing as how I expect my Warlord to achieve any pose required of it I built it according to my subliminal engineering intuition.
Now it's not svelte as say the ''Tacoma Narrows Bridge'' (Galloping Gertie)

http://www.youtube.com/watch?v=j-zczJXSxnw

but then I haven't an engineering degree so I tend to overbuild.............
--
E. Blackadder
 
The Hidden Components

Okay while I have this apart I should explain what the various locking devices I have installed to make this thing readily repairable.

On the image below you see the inner sleeve that mounts the hip screw to the hip axle. That inner sleeve contains a blind nut that the bolt holding the hip to the axle is installed. The blind nut is epoxied in place and I am hoping never breaks loose but if it does I need to get at it to repair so at the 3 and 9 o'clock positions I threaded locking setscrews that hold the sleeve in place half the thread being in the sleeve and half the thread in the outer mount ring.

http://i.imgur.com/MLl6Ziy.jpg
ai.imgur.com_MLl6Ziyl.webp


With any luck no one including myself need ever see this again.

In the image below the steering disk is press fit over the outer mount ring. The hip bolt passes through the leg and tightens into the inner sleeve locking the steering ring in place without the need for glue so that the steering cylinders can be repaired if needs be.

http://i.imgur.com/jNQY6pd.jpg
ai.imgur.com_jNQY6pdl.webp


Again I am hoping that none of this ever need be disassembled but better that it can than not.

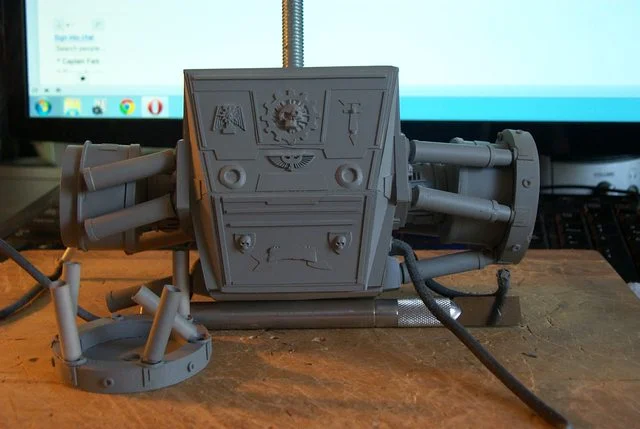
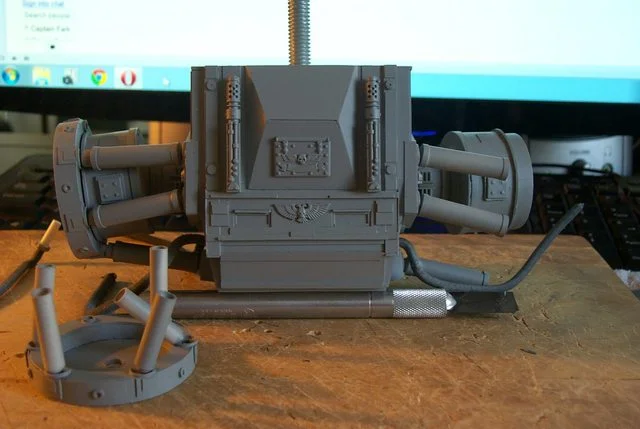
The two following images show the front and back of the waist/pelvis. I have installed various icons and symbols that I hope are not at odds with the Titan/A.M. guild. I would appreciate any input regarding a conflicting error in the logos.

The Front:

http://i.imgur.com/reY0w5D.jpg
ai.imgur.com_reY0w5Dl.webp


and the rear:

http://i.imgur.com/PExe5ay.jpg
ai.imgur.com_PExe5ayl.webp
 
Titan Hunter Formation

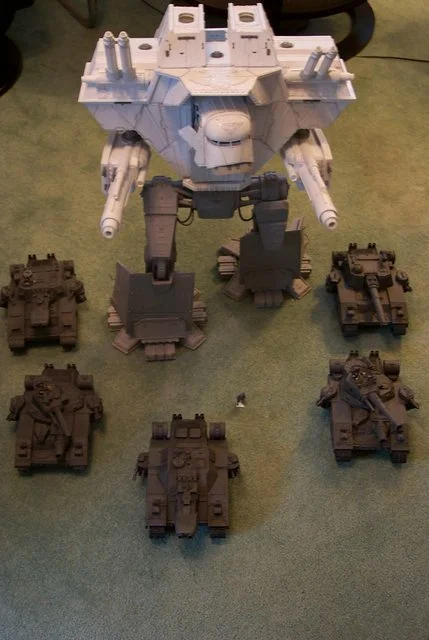
The first time Luteus Vexant has stood in full stride without careful balancing (I still need to pack half a kilo of lead in the back for optimum stability) but the hip joints are solid and capable of supporting Luteus' 7 kilo bulk.

Here he is with a third of my Superheavy company in vanguard support. Sorry no infantry as yet.

http://i.imgur.com/hrg4Zev.jpg
ai.imgur.com_hrg4Zevl.webp


This image has been a long time coming...............

The Blackadder is pleased.
 
Starting to look really good! I am surprised you had the patience to continue this long O_O I would have just called it quits and used some ducktape.
 
Lucie Errant

Conspicuously absent from the above assemblage was Lucie.

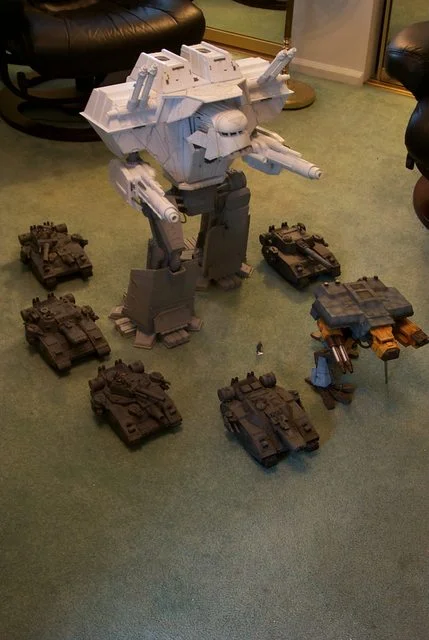
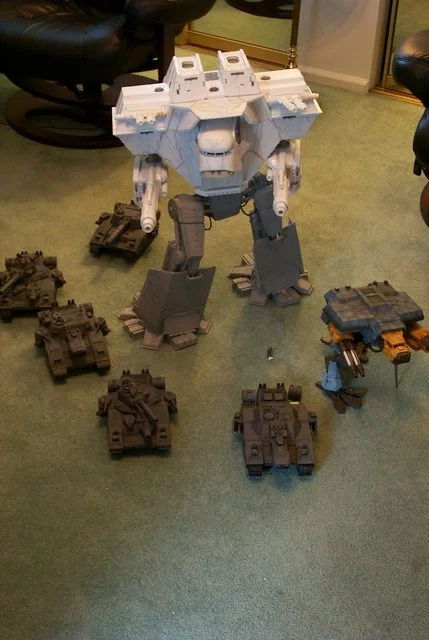
Removing her from her cabinet revealed she had lost a bit of stiffness in her joints over the winter so she is standing with the aid of a makeshift prop. So in this family portrait are two scratchbuilt Titans and two scratchbuilt Super-heavies.

http://i.imgur.com/vOWzxEY.jpg
ai.imgur.com_vOWzxEYl.webp


In the second image I repositioned Luteus' legs without adjusting the screws. A bad move; the void generator fell out of the housing and dislodged the aux tank on the Titan Hunter. No big deal but I didn't notice it when I took the picture.

Anyway the repositioning demonstrates the flexibilities of the appendages.

http://i.imgur.com/g4vvZQw.jpg
ai.imgur.com_g4vvZQwl.webp


BTW I forgot to mention, the two tanks in the foreground are the scratches.
 
That is disgusting Adder. :konrad:

If you didn't tell me which tanks were scratch there is literally no way I would have ever known. Granted it's probably at least a bit more obvious up closer, that is still a ridiculously well built set of models, let alone for being made by your own design (Well, with artistic references).

Seriously, that is just amazing. On the super heavy tanks, did you fabricate the main-guns, or were there parts used from kits along with scratch assembly for the chaise?

I wish I had the dedication/compulsion to complete such a grand scheme. :ghost:
 
Didn't I post a WIP on these scratches here?

Sorry; I'll start a thread..............

https://www.vampirecounts.net/Thread-Chopping-up-the-Armorcast-Baneblade-or-The-Blackadder-s-Heresy
 
Pissed the Day Away

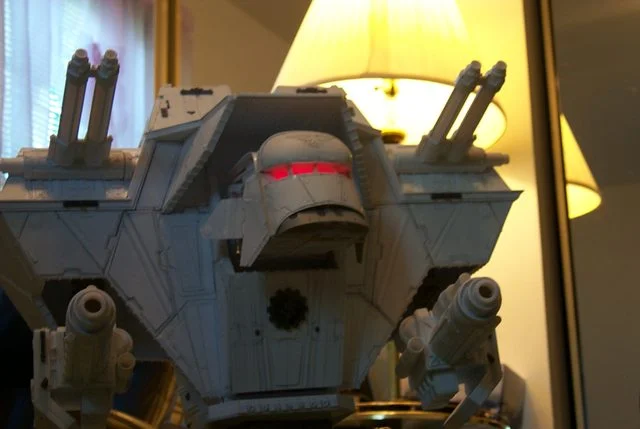
Just so ya don't think the Blackadder pissed the day away posting on the various forums I subscribe I did do some experimentation on the cockpit lighting. It looks as though I may need a light diffuser to obtain the particular form of malevolence I am reaching for. But for a first try very gratifying............

http://i.imgur.com/DL7JIQb.jpg
ai.imgur.com_DL7JIQbl.webp
 

About us

  • Our community has been around for many years and pride ourselves on offering unbiased, critical discussion among people of all different backgrounds. We are working every day to make sure our community is one of the best.

Quick Navigation

User Menu